HiveMQ Platform How-Tos
Configure server-side TLS with HiveMQ and Keytool (self-signed)
The next sections give you step-by-step instructions on how to configure server-side SSL/TLS with HiveMQ.
In this scenario, the client only validates the correct server certificate.
Generate a server-side certificate for HiveMQ
-
Execute the following command and enter all prompted information for the certificate:
keytool -genkey -keyalg RSA -alias hivemq -keystore hivemq.jks -storepass changeme -validity 360 -keysize 2048We highly recommend that you update the changemedefault to a strong password.The first question asks about your first and last name. This is the common name of your certificate. Please enter the URL under which you will connect with your MQTT clients. For example, broker.yourdomain.com(for production) orlocalhost(for development). -
Select yes to confirm your entries.
-
Define a password for the newly generated key.
We highly recommend not to use the same password for the key and the key store. -
Place the
hivemq.jksin the HiveMQ directory and add a TLS listener to theconfig.xmlfile.<listeners> ... <tls-tcp-listener> <port>8883</port> <bind-address>0.0.0.0</bind-address> <tls> <keystore> <path>hivemq.jks</path> <password>your-keystore-password</password> <private-key-password>your-key-password</private-key-password> </keystore> <client-authentication-mode>NONE</client-authentication-mode> </tls> </tls-tcp-listener> ... </listeners>The your-keystore-passwordandyour-key-passwordpasswords depend on the passwords from the previous steps.
Generate a PEM client certificate (mosquitto_pub/_sub)
When you connect with mosquitto_pub/_sub command-line utilities, a PEM file of the certificate is required to allow the mosquitto clients to validate the self-signed certificate. You need to have access to the server key store generated in the above steps.
-
To export a PEM file from the server key store, enter:
keytool -exportcert -keystore hivemq.jks -alias hivemq -keypass your-key-password -storepass your-keystore-password -rfc -file hivemq-server-cert.pemBe sure to replace your-keystore-passwordandyour-key-passwordin the command with your chosen passwords. -
To use the PEM with mosquitto_pub, enter:
mosquitto_pub -t "test/topic" -m "TLS works with client PEM" -p 8883 --cafile hivemq-server-cert.pem
Generate a client JKS trust store (Paho Java)
When you connect with a Java MQTT client, a JKS client key store is required to validate the self-signed certificate. You need to have access to the server key store generated in the above steps.
-
Export the server certificate from the server key store
keytool -export -keystore hivemq.jks -alias hivemq -storepass your-keystore-password -file hivemq-server.crtBe sure to replace your-keystore-passwordin the command with your chosen password. -
To generate a client trust store, enter:
keytool -import -file hivemq-server.crt -alias HiveMQ -keystore mqtt-client-trust-store.jks -storepass changemeWe highly recommend the use of a strong password instead of changeme.-
Confirm the certificate with yes, before the trust store is successfully created.
-
-
Connect with Eclipse Paho
The following simple example only shows how to test if TLS is working.
For production usage, a more sophisticated implementation is necessary.Connect to HiveMQ with SSL using Eclipse Pahoprivate static Logger log = LoggerFactory.getLogger(PublisherSSL.class); public static void main(String... args) { try { String clientId = "sslTestClient"; MqttClient client = new MqttClient("ssl://localhost:8883", clientId, new MemoryPersistence()); MqttConnectOptions mqttConnectOptions = new MqttConnectOptions(); try { mqttConnectOptions.setSocketFactory(getTruststoreFactory()); } catch (Exception e) { log.error("Error while setting up TLS", e); } client.connect(mqttConnectOptions); client.publish("test/topic", "TLS works with client JKS!".getBytes(), 0, false); client.disconnect(); } catch (MqttException e) { log.error("MQTT Exception:",e); } } public static SocketFactory getTruststoreFactory() throws Exception { KeyStore trustStore = KeyStore.getInstance("JKS"); InputStream in = new FileInputStream("mqtt-client-trust-store.jks"); trustStore.load(in, "your-client-keystore-password".toCharArray()); TrustManagerFactory tmf = TrustManagerFactory.getInstance(TrustManagerFactory.getDefaultAlgorithm()); tmf.init(trustStore); SSLContext sslCtx = SSLContext.getInstance("TLSv1.2"); sslCtx.init(null, tmf.getTrustManagers(), null); return sslCtx.getSocketFactory(); }Remember to replace the passwords in the snippet with your chosen passwords.
Configure TLS with HiveMQ and Portecle (self-signed)
-
Download and unzip the current version of Portecle.
-
To start Portecle, double-click the provided
portecle.jarfile or enterjava -jar portecle.jarin the console:Portecle after start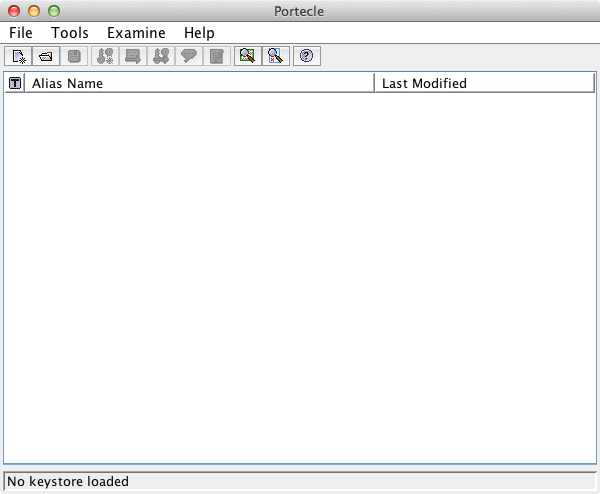
-
To create the server key store, select File → New Keystore from the menu and select JKS as key store type in the popup window:
Choose Java key store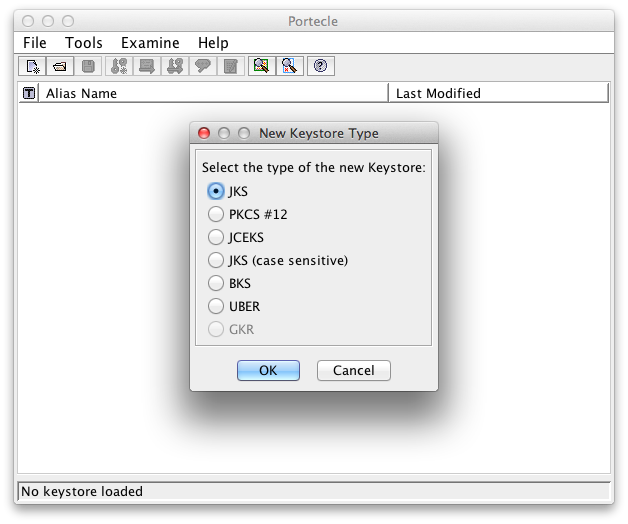
-
To create a new key pair, select Tools → Generate Key Pair and define the Key Algorithm and Key Size:
Common Key Algorithm and Size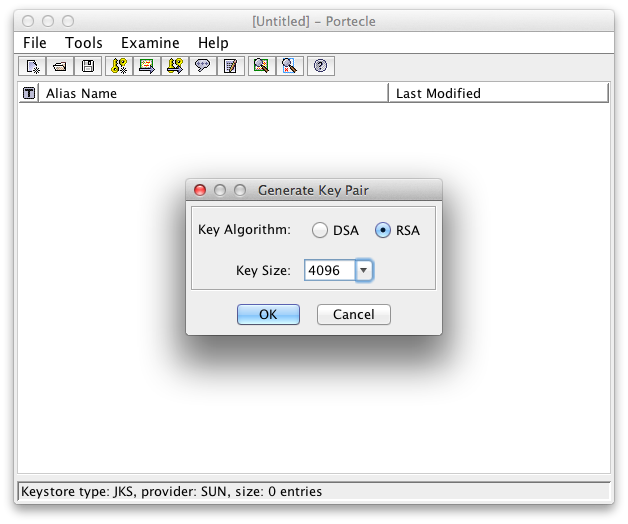
-
Enter the Signature Algorithm ( SHA512withRSA is recommended) and the Certificate Details:
Certificate Signature Algorithm and Details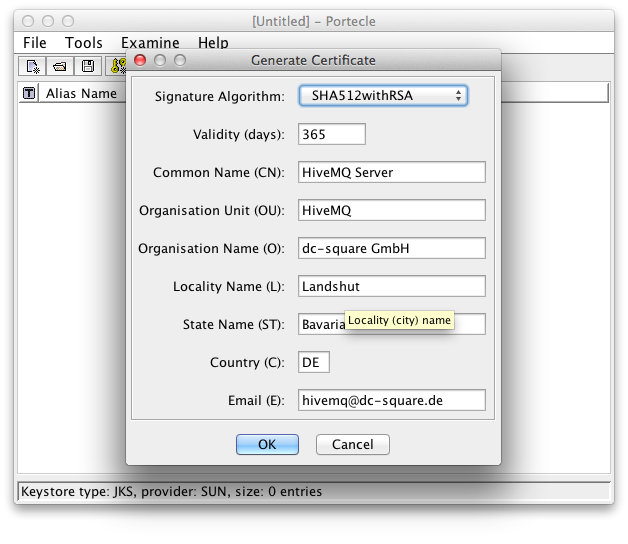
-
Choose a Key Pair Entry Alias:
An alias for the key pair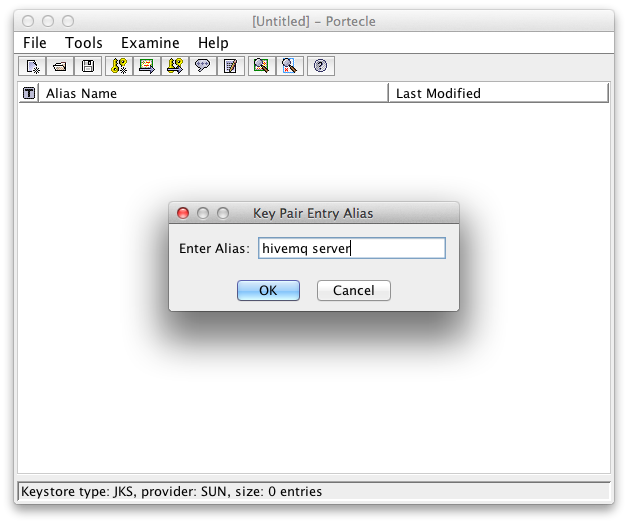
-
Set a password for the Key Pair Entry:
A password to protect the private key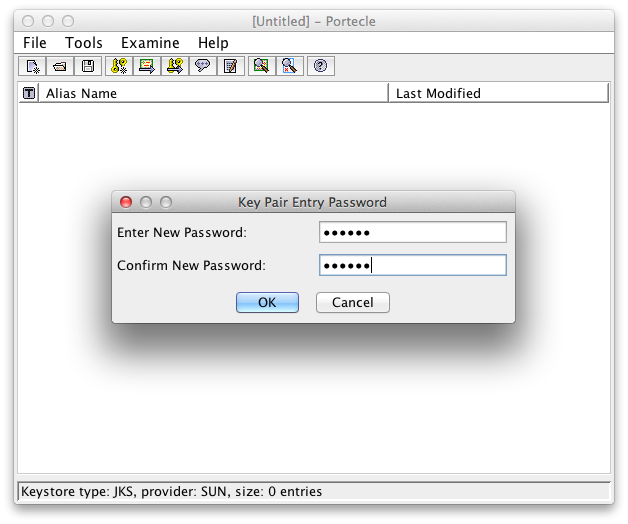 Successful Generation of Key Pair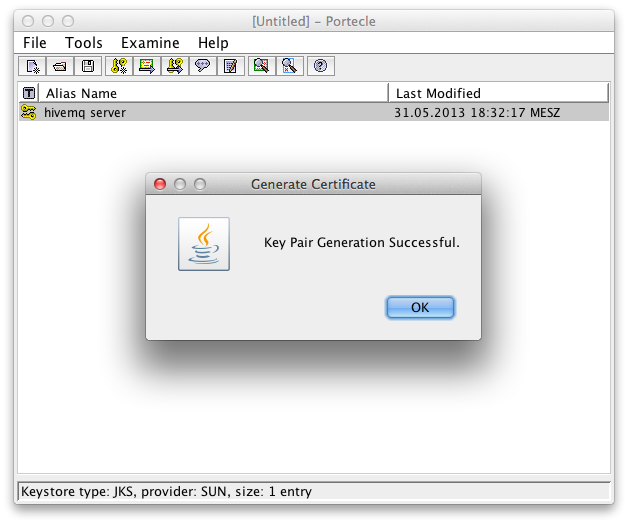
-
To save the key store, define File → Save Keystore As…:
Save the key store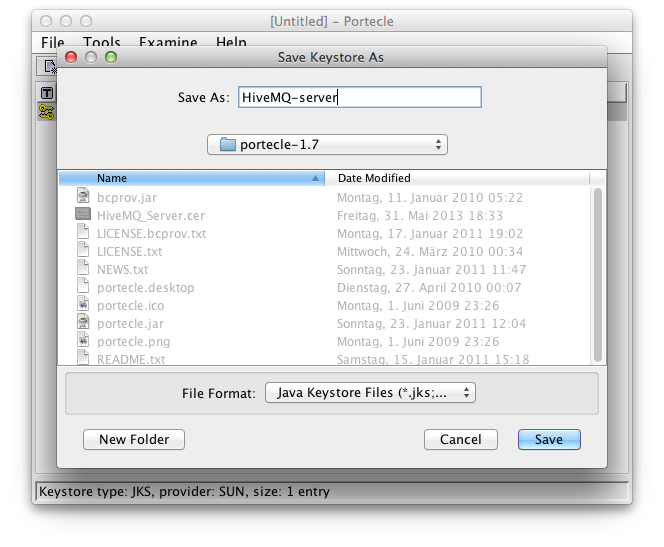
-
-
To export the certificate for the client, right-click the certificate key pair and select Export.
-
Select Head Certificate as Export Type and choose an export format ( PEM is recommended):
Export Details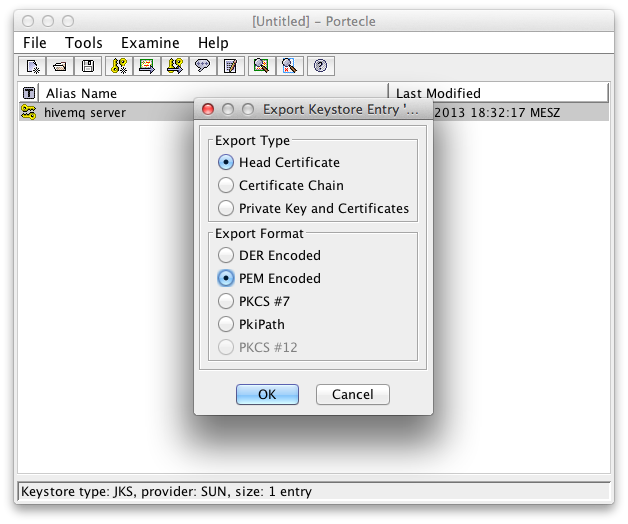
-
-
Select Choose directory to save the certificate.
Export Successful
-
Next, create the client key store
-
Select File → New Keystore from the menu and JKS as key store type.
-
Import the just saved certificate via Tools → Import Trusted Certificate.
-
Select the previous exported certificate:
Import server head certificate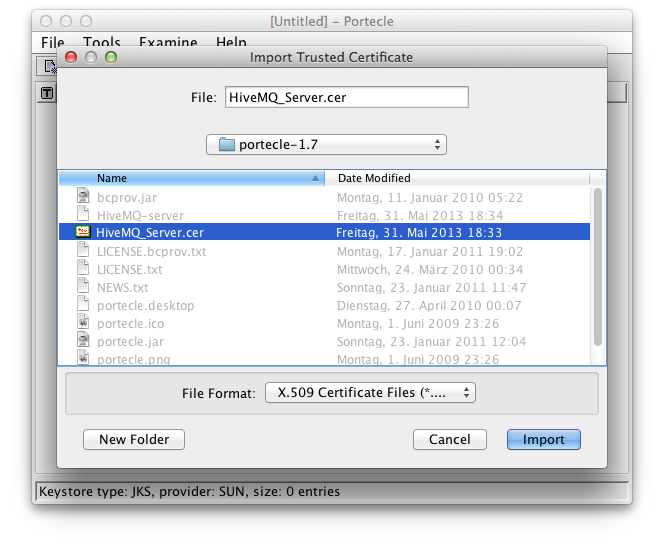
-
Confirm the message that the trust path could not be established.
This is because the certificate is self-signed and no certificate chain can verify it:Warning because of the self-signed certificate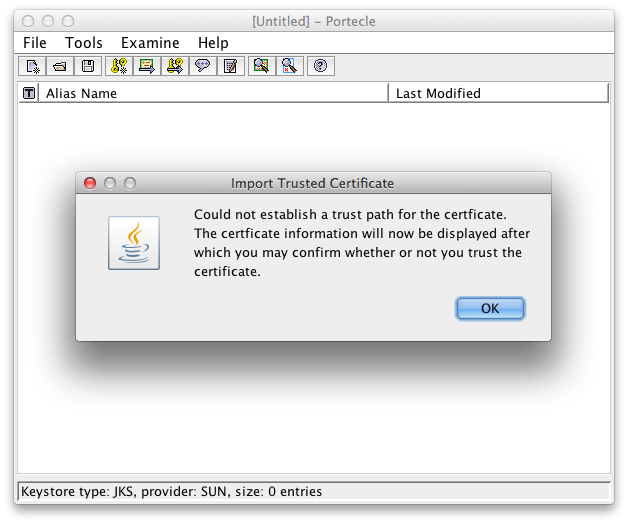
-
Confirm the showed certificate details:
Certificate Details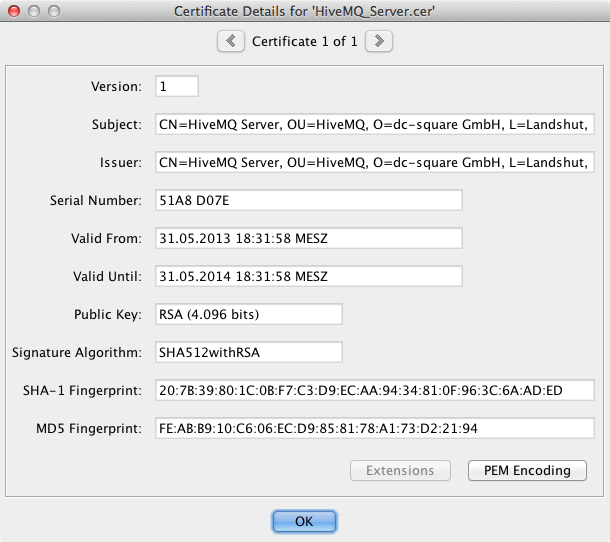
-
To trust the certificate, click Yes.
Trust the created self-signed certificate for the server -
Enter an alias:
Alias for the server certificate in the client key store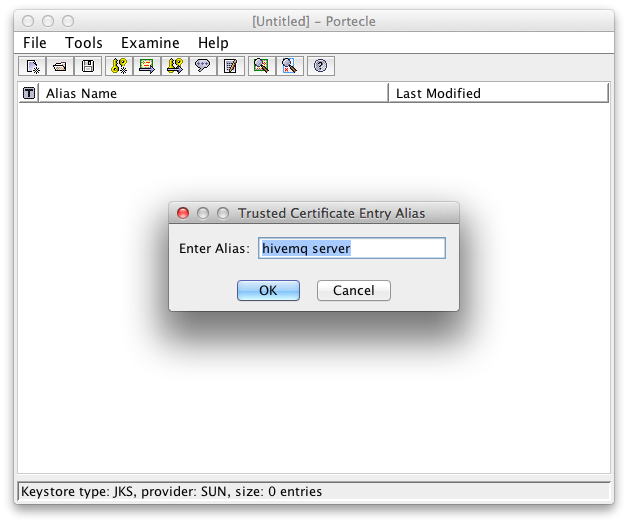 Successful import of the server certificate in the client key store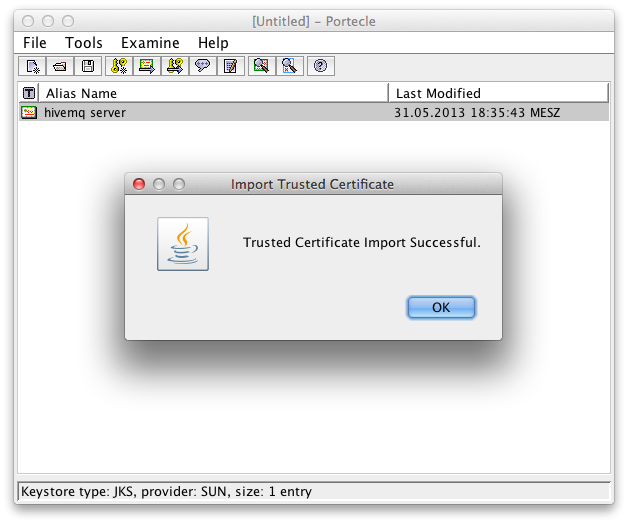
-
Save the key store as client.jks with File → Save Keystore As….
-
-
Place the server.jks in the HiveMQ directory and add a TLS listener to config.xml.
<listeners> ... <tls-tcp-listener> <port>8883</port> <bind-address>0.0.0.0</bind-address> <tls> <keystore> <path>server.jks</path> <password>your-keystore-password</password> <private-key-password>your-key-password</private-key-password> </keystore> <client-authentication-mode>NONE</client-authentication-mode> </tls> </tls-tcp-listener> ... </listeners> -
Use
client.jksto connect with a client.
Configure TLS with client certificates (self-signed) for HiveMQ using Keytool
Configure with PEM files (for mosquitto_pub/_sub and other clients)
-
Follow the procedures to Generate a server-side certificate for HiveMQ and Generate a PEM client certificate.
-
Make sure the server-side TLS works with mosquitto_pub/_sub and HiveMQ.
-
Generate client certificates.
This step needs to be done for each client that connects to HiveMQ. Also this is not the only way on how to create certificates. There are different options depending on your use case and capabilities. -
To generate a client certificate for PEM-based clients such as mosquitto_sub/_pub, execute the following command for each client:
openssl req -x509 -newkey rsa:2048 -keyout mqtt-client-key-2.pem -out mqtt-client-cert-2.pem -days 360Enter all prompted information for the certificate.
You end up with two PEM files: mqtt-client-key-2.pem and mqtt-client-cert-2.pem.
-
-
Create a trust store for HiveMQ.
When the client connects with a certificate, HiveMQ needs a trust store in order to validate the self-signed certificates. You need to have access to all certificate PEM files generated in the previous step.
-
To export the client certificate from the PEM certification file, enter:
openssl x509 -outform der -in mqtt-client-cert-2.pem -out mqtt-client-cert-2.crt -
To generate one common server trust store, execute the following command for each client certificate:
keytool -import -file mqtt-client-cert-2.crt -alias client2 -keystore hivemq-trust-store.jks -storepass changemeWe highly recommend the use of a strong password instead of changeme.Confirm the certificate with yes, before the trust store is successfully created.
-
-
Change the
config.xmlin the HiveMQ home directory<listeners> ... <tls-tcp-listener> ... <tls> <keystore> ... </keystore> <client-authentication-mode>REQUIRED</client-authentication-mode> <truststore> <path>hivemq-trust-store.jks</path> <password>your-hivemq-trust-store-password</password> </truststore> </tls> </tls-tcp-listener> ... </listeners>-
Connect with mosquitto_pub/_sub to HiveMQ
In the code example, we use the previously generated client trust store (hivemq-server-cert.pem) and the just generated PEM files to set up a full TLS client authentication to HiveMQ.
mosquitto_pub -t "test" -m "test" -p 8883 --cert mqtt-client-cert-2.pem --key mqtt-client-key-2.pem --cafile hivemq-server-cert.pem
-
Configure with Java Key stores (Eclipse Paho Java clients)
-
Follow the procedures to Generate a server-side certificate for HiveMQ and Generate a PEM client certificate.
-
Make sure the server-side TLS works with Eclipse Paho and HiveMQ.
-
To generate a client certificate for each Eclipse Paho Java client, execute the following command for each client and enter all prompted information for the certificate:
keytool -genkey -keyalg RSA -alias mqtt-paho-client-1 -keystore mqtt-paho-client-1.jks -storepass changeme -validity 360 -keysize 4096We highly recommend the use of a strong password instead of changeme.This step needs to be done for each client that connects to HiveMQ. Also, this is not the only way to create certificates. There are different options depending on your use case and capabilities. -
Generate one common server trust store for HiveMQ.
When the client connects with a certificate, HiveMQ needs a trust store to validate the self-signed certificates. You need to have access to all client key stores generated in the previous step.
-
To export the client certificate from each of the client key stores, enter:
keytool -export -keystore mqtt-paho-client-1.jks -alias mqtt-paho-client-1 -storepass your-client-keystore-password -file mqtt-paho-client-1.crtRemember to replace your-client-keystore-passwordin the command with your chosen key store password. -
To generate a server trust store, execute the following command for each client certificate:
keytool -import -file mqtt-paho-client-1.crt -alias client1 -keystore hivemq-trust-store.jks -storepass changemeWe highly recommend the use of a strong password instead of changeme.-
Confirm the certificate with yes, before the trust store is successfully created.
-
-
Change the
config.xmlin the HiveMQ home directory:<listeners> ... <tls-tcp-listener> ... <tls> <keystore> ... </keystore> <client-authentication-mode>REQUIRED</client-authentication-mode> <truststore> <path>hivemq-trust-store.jks</path> <password>your-hivemq-trust-store-password</password> </truststore> </tls> </tls-tcp-listener> ... </listeners>-
Connect with Paho
In the code example, we use the previously generated client trust store and the just generated client key store to set up a full TLS client authentication with Eclipse Paho for Java
This simple example only tests whether TLS is working. For production usage, a more sophisticated implementation is necessary. Connect to HiveMQ with SSL using Eclipse Pahoprivate static Logger log = LoggerFactory.getLogger(PublisherClientCertSSL.class); public static void main(String... args) { try { String clientId = "sslTestWithCert"; MqttClient client = new MqttClient("ssl://localhost:8883", clientId, new MemoryPersistence()); MqttConnectOptions mqttConnectOptions = new MqttConnectOptions(); try { mqttConnectOptions.setSocketFactory(getTruststoreFactory()); } catch (Exception e) { log.error("Error while setting up TLS", e); } client.connect(mqttConnectOptions); client.publish("test", "test".getBytes(), 1, true); client.disconnect(); } catch (MqttException e) { log.error("MQTT Exception:",e); } } public static SocketFactory getTruststoreFactory() throws Exception { //Create key store KeyStore keyStore = KeyStore.getInstance("JKS"); InputStream inKey = new FileInputStream("mqtt-paho-client-1.jks"); keyStore.load(inKey, "your-client-key-store-password".toCharArray()); KeyManagerFactory kmf = KeyManagerFactory .getInstance(KeyManagerFactory.getDefaultAlgorithm()); kmf.init(keyStore,"your-client-key-password".toCharArray()); //Create trust store KeyStore trustStore = KeyStore.getInstance("JKS"); InputStream in = new FileInputStream("mqtt-client-trust-store.jks"); trustStore.load(in, "your-client-trust-store-password".toCharArray()); TrustManagerFactory tmf = TrustManagerFactory .getInstance(TrustManagerFactory.getDefaultAlgorithm()); tmf.init(trustStore); // Build SSL context SSLContext sslCtx = SSLContext.getInstance("TLSv1.2"); sslCtx.init(kmf.getKeyManagers(), tmf.getTrustManagers() , null); return sslCtx.getSocketFactory(); }Remember to replace the passwords in the snippet with your chosen passwords.
-
Connect to an OPC UA server that uses a self-signed certificate
Factory networks often have no certificate authority. Each machine presents a certificate that is issued to itself. Such a certificate does not chain to any anchor in the default JVM trust bundle, so chain validation fails. You can install the device certificate in the truststore as its own trust anchor. This works, but it costs one truststore entry per machine. You must also re-export and redistribute the entry each time the certificate rotates. This how-to uses the lighter fingerprint allow-list workflow instead. It takes you from the first refused connection to a working, encrypted connection whose server certificate is trusted by its fingerprint.
The example uses the freely available Prosys OPC UA Simulation Server, but nothing here is specific to that server. Every log line quoted below comes from an actual run of these steps.
Before you start, make sure you have the following resources:
-
A running OPC UA server that offers a secured endpoint.
-
Administrative access to that server, to trust the HiveMQ Edge client certificate.
-
keytool, which ships with every JDK. -
An MQTT client, to confirm that data arrives. The example uses the MQTT CLI.
Three different refusals stand between your starting point and flowing data. OPC UA trust runs in both directions. Each refusal has a distinct log signature, quoted in the steps exactly as the adapter prints it. The signature always tells you which refusal you face.
| Fixed in | Log signature | What it means |
|---|---|---|
Step 2 |
|
HiveMQ Edge has no client certificate to present. |
Step 3 |
|
The server does not trust the HiveMQ Edge certificate yet. |
Steps 5–6 |
|
HiveMQ Edge does not trust the server certificate yet. |
1. Start from a refused connection
Configure the adapter as usual and choose a security policy other than NONE. The tag and mapping are
what make the result observable at the end. The node ns=3;i=1001 is the counter node of the Prosys
simulation server, published to factory/counter. Substitute a node your server offers.
<protocol-adapter>
    <adapterId>simulation-server</adapterId>
    <protocolId>opcua</protocolId>
    <config>
        <uri>opc.tcp://machine-1.factory.local:53530/OPCUA/SimulationServer</uri>
        <security>
            <policy>BASIC256SHA256</policy>
        </security>
        <tls>
            <enabled>true</enabled>
        </tls>
    </config>
    <tags>
        <tag>
            <name>counter</name>
            <description>The simulation server's counter node</description>
            <definition>
                <node>ns=3;i=1001</node>
            </definition>
        </tag>
    </tags>
    <northboundMappings>
        <northboundMapping>
            <tagName>counter</tagName>
            <topic>factory/counter</topic>
        </northboundMapping>
    </northboundMappings>
</protocol-adapter>
The adapter starts, but it does not connect. The reason is the WARN; the ERROR beneath it is the
consequence, and it repeats on every retry:
WARN  - OPC UA Security policy 'http://opcfoundation.org/UA/SecurityPolicy#Basic256Sha256'
        for protocol adapter 'simulation-server' requires a keystore, cannot connect.
ERROR - Unable to create OPC UA client for adapter 'simulation-server'
UaException: status=Bad_ConfigurationError, message=no endpoint selected
Every security policy other than NONE requires HiveMQ Edge to present its own client
certificate. A <keystore> element is therefore mandatory, not only for x509 authentication. Step 2
creates one.
|
|
Until step 5, the adapter logs two more warnings at every start. Both are about the default
Both are described in the validation axes. |
2. Give HiveMQ Edge a client certificate
OPC UA identifies an application by the URI in its certificate. The certificate must therefore carry a
SubjectAltName URI. Generate a self-signed key pair with keytool:
keytool -genkeypair -alias edge-client -keyalg RSA -keysize 2048 -validity 365 \
  -dname "CN=HiveMQ Edge, O=Example, C=DE" \
  -ext "san=uri:urn:hivemq:edge:client,dns:edge-host.factory.local" \
  -ext "KeyUsage=digitalSignature,keyEncipherment,dataEncipherment,nonRepudiation,keyCertSign" \
  -ext "ExtendedKeyUsage=clientAuth,serverAuth" \
  -keystore edge-client.jks -storepass changeme -keypass changeme
Replace changeme with strong passwords. In the dns: entry, use the real host name of the
machine that runs HiveMQ Edge.
|
Point the adapter at the keystore:
<tls>
    <enabled>true</enabled>
    <keystore>
        <path>conf/edge-client.jks</path>
        <password>changeme</password>
        <privateKeyPassword>changeme</privateKeyPassword>
    </keystore>
</tls>
3. Trust the HiveMQ Edge certificate on the server
OPC UA trust runs in both directions. Until the server trusts the certificate you just created, the connection is refused by the server. The error resembles a problem with the server’s own certificate:
ERROR - [remote=machine-1.factory.local/192.168.1.123:53530] errorMessage=ErrorMessage{
        error=StatusCode[name=Bad_SecurityChecksFailed, value=0x80130000, quality=bad]}
Start HiveMQ Edge once and let it attempt the connection. The server records the certificate it
rejected. Most servers place it in a rejected certificates folder and offer a way to promote it to
trusted. In the Prosys simulation server, open the Certificates tab. Select the certificate whose
subject matches the -dname value that you chose above, CN=HiveMQ Edge, O=Example, C=DE. Trust the
certificate, then restart the server.
HiveMQ Edge retries with backoff and picks up the change on its next attempt. Restart HiveMQ Edge only if you would rather not wait out the backoff delay.
This step is easy to mistake for a HiveMQ Edge problem. A failure message with a
[remote=…] prefix comes from the server. Fix it on the server side.
|
4. Recognize the failure that this how-to solves
With the client certificate trusted, HiveMQ Edge gets far enough to judge the server certificate. It then refuses that certificate:
INFO  - OPC UA adapter has no user truststore configured; falling back to JVM cacerts. If the
        server presents a self-signed certificate that does not chain to a public CA, use
        tlsChecks=SELF_SIGNED to trust it by fingerprint instead.
ERROR - [remote=machine-1.factory.local/192.168.1.123:53530] Exception caught: UaException:
        status=Bad_SecurityChecksFailed, message=sun.security.provider.certpath.
        SunCertPathBuilderException: unable to find valid certification path to requested target
This is the message to recognize. It does not mean the certificate is invalid. It means that the certificate chains to nothing HiveMQ Edge trusts, which is exactly what a self-signed certificate does.
tlsChecks=NONE does not solve this. Despite the name, it still requires the certificate to
chain to a trust anchor. It only switches off the checks layered on top. See
Certificate validation.
|
5. Obtain the server fingerprint
Instead of a trust anchor, give HiveMQ Edge the SHA-256 fingerprint of the specific certificate to accept. You can obtain the fingerprint in three ways:
-
From the device vendor. A fingerprint is short enough to send by email or read out over the phone. This is what makes the approach workable when no CA exists.
-
From the certificate file, if you have it:
openssl x509 -in server-cert.pem -noout -fingerprint -sha256 -
From the HiveMQ Edge log, as shown below.
To use the log, create the allow list with a placeholder entry and let the connection fail once:
# Fingerprints of the OPC UA servers this Edge is allowed to talk to.
# Placeholder so the adapter starts; replace with the real fingerprint.
0000000000000000000000000000000000000000000000000000000000000000
The placeholder line matters. An allow list that contains no fingerprints stops the
adapter from starting, because an empty allow list would reject every server:
Certificate allow-list '…' contains no fingerprints.
|
Configure the SELF_SIGNED preset and point it at the file:
<tls>
    <enabled>true</enabled>
    <tlsChecks>SELF_SIGNED</tlsChecks>
    <allowList>
        <path>conf/opcua-fingerprints.txt</path>
    </allowList>
    <keystore>
        <path>conf/edge-client.jks</path>
        <password>changeme</password>
        <privateKeyPassword>changeme</privateKeyPassword>
    </keystore>
</tls>
The adapter now reads the allow list at start. The placeholder counts as an entry, which is why the
INFO line reports one fingerprint. The rejection names the certificate that the server presented, in
the exact format the file accepts:
INFO - OPC UA adapter endpoint 'opc.tcp://machine-1.factory.local:53530/OPCUA/SimulationServer':
       server certificates are trusted by fingerprint; 1 fingerprint(s) loaded from
       'conf/opcua-fingerprints.txt'.
WARN - OPC UA adapter endpoint 'opc.tcp://machine-1.factory.local:53530/OPCUA/SimulationServer':
       the server certificate was rejected, its SHA-256 fingerprint is not in the configured
       allow-list. Subject='DC=machine-1.factory.local,O=Prosys OPC,CN=SimulationServer@machine-1',
       issuer='DC=machine-1.factory.local,O=Prosys OPC,CN=SimulationServer@machine-1',
       fingerprint=8c:6c:ce:4e:be:50:a0:f6:52:75:c1:5a:f3:27:28:a9:a3:71:13:45:e0:ae:36:f6:0b:fd:
       62:84:4e:dc:95:20. If this is the expected server, add the fingerprint to the allow-list
file, then restart the adapter - the allow-list is read once at adapter start.| Read the subject and issuer before you trust a fingerprint taken from the log. At that moment nothing has verified the certificate, so only do this on a network where you can be sure no attacker is interposed. A fingerprint obtained from the vendor is the safer route. |
6. Add the fingerprint and connect
Replace the placeholder with the fingerprint from the log:
# Fingerprints of the OPC UA servers this Edge is allowed to talk to.

# machine-1 - Prosys simulation server
8c:6c:ce:4e:be:50:a0:f6:52:75:c1:5a:f3:27:28:a9:a3:71:13:45:e0:ae:36:f6:0b:fd:62:84:4e:dc:95:20
Restart HiveMQ Edge. The first line is the same one step 5 produced. What marks success is that no rejection follows it:
INFO - OPC UA adapter endpoint 'opc.tcp://machine-1.factory.local:53530/OPCUA/SimulationServer':
       server certificates are trusted by fingerprint; 1 fingerprint(s) loaded from
       'conf/opcua-fingerprints.txt'.
INFO - OPC UA subscription created with publishingInterval=1000.0ms (requested 1000ms)
INFO - OPC UA adapter 'simulation-server' connected successfully
Subscribe to the topic from the mapping in step 1 and you will see the counter values arriving over the OPC UA connection that you just secured: encrypted, and from the server whose fingerprint you enrolled:
mqtt sub -h localhost -p 1883 -t 'factory/#'
What is encrypted here is the OPC UA hop between HiveMQ Edge and the device. The MQTT hop in this
command uses the plain listener on port 1883. That is acceptable on localhost but it is not
encrypted. To protect MQTT traffic that leaves the machine, configure a TLS listener and subscribe
through it (typically port 8883 with the appropriate trust options). See
Secure TCP Listener.
|
{
  "value" : 19,
  "timestamp" : 1785944119747
}
7. Resolve Bad_CertificateHostNameInvalid or Bad_CertificateUriInvalid
The SELF_SIGNED preset also requires the certificate to identify the endpoint. The certificate must
carry the expected ApplicationUri and a host name that matches the endpoint. Device certificates
sometimes carry neither. If you see one of these status codes, switch from the preset to the individual
axes and relax only the check that fails. The following configuration drops the hostname check, which
resolves Bad_CertificateHostNameInvalid:
<tls>
    <enabled>true</enabled>
    <tlsChecksFull>
        <trustMode>ALLOW_LIST</trustMode>
        <hostname>NONE</hostname>
        <revocation>NONE</revocation>
        <keyUsage>NONE</keyUsage>
    </tlsChecksFull>
    <allowList>
        <path>conf/opcua-fingerprints.txt</path>
    </allowList>
    ...
</tls>
For Bad_CertificateUriInvalid relax sanUri instead. Replace <hostname>NONE</hostname>
with <sanUri>NONE</sanUri>, which keeps the hostname check enforced.
Omit an axis you do not want to set. Do not leave its element empty. An empty element in
first position collapses the whole block and stops the adapter from starting. An empty element in any
later position, such as <hostname></hostname> in the recipe above, silently means the axis is unset.
An unset axis resolves to its strictest value. That is the exact opposite of the NONE you wanted, and
nothing refuses the configuration to tell you. A misspelled axis name is caught. For example,
<trustmode> rather than <trustMode> stops the adapter at start-up and names the entry, rather than
leaving the axis at a default you did not choose.
Note also that revocation and keyUsage must be set to NONE explicitly here.
Each omitted axis takes its strictest value, and the SELF_SIGNED preset you are migrating from
requires neither. revocation needs a certification path, which ALLOW_LIST does not build.
keyUsage is relaxed because device certificates frequently carry no key-usage extensions. Leaving it
out would refuse exactly those certificates with Bad_CertificateUseNotAllowed.
|
What this does and does not protect against
The allow list is a trust set. The adapter accepts any certificate whose fingerprint appears in its file. A per-adapter file that holds exactly one fingerprint is what this how-to builds, and it amounts to pinning one specific certificate. It detects the replacement of that certificate. If the device certificate is rotated, or a different machine answers on the same address, the connection fails until you deliberately add the new fingerprint.
Several fingerprints in one file, or one file shared across adapters, weakens this guarantee.
Every listed certificate then passes the trust decision on every adapter that uses the file.
Identity checks become the only way to tell listed servers apart. If you relaxed hostname or sanUri
in step 7, a different listed machine answering on this adapter’s address is not detected. When
single-certificate pinning matters, keep one file per adapter with exactly the one fingerprint that
adapter should accept.
None of this establishes that the certificate was genuine in the first place. Whoever writes
the allow list trusts the channel that delivered the fingerprint: the vendor’s email, a phone
call, a device label. This is the same limitation as the first ssh connection to a new host. Treat
the fingerprint with the care you would give the certificate itself.
For the full model, including all six validation axes and a table that maps connection errors to their causes, see the OPC UA TLS configuration reference.