Getting Started with HiveMQ Pulse
This guide walks you through the initial setup and configuration of HiveMQ Pulse.
HiveMQ Pulse Account Creation
-
Contact HiveMQ to register for access.
-
A HiveMQ team member establishes contact with you to create your HiveMQ Pulse account.
-
HiveMQ Pulse is accessed through the HiveMQ Cloud console of your existing HiveMQ Cloud account.
If you do not have a HiveMQ Cloud account yet, a HiveMQ team member creates a new HiveMQ Cloud account for you and assists you with the initial sign-up details.
HiveMQ Pulse Login
-
When the HiveMQ Pulse feature is enabled, a confirmation email is automatically sent to the email address associated with your HiveMQ Cloud account.
-
To log in, navigate to console.hivemq.cloud and enter your HiveMQ Cloud login credentials.
-
In the main navigation of your HiveMQ Cloud console, select the Pulse menu point to open your HiveMQ Pulse Server.
| For easy access to your HiveMQ Pulse project, bookmark the URL of your Pulse Server. |
| The owner of the HiveMQ Cloud account can invite an unlimited number of members to join their HiveMQ Cloud organization and access their HiveMQ Pulse deployment. For more information, see HiveMQ Cloud Organizations and Invite Organization Members. |
Open Your HiveMQ Pulse Project
A project is the primary organizational unit in HiveMQ Pulse. Each project encapsulates a complete and distinct operational environment.
In this guide, we provide an introduction on how to achieve the following with your initial HiveMQ Pulse project:
-
Connect HiveMQ Pulse with your specific infrastructure.
-
Build a new namespace that provides logical isolation of resources and workloads.
-
Leverage built-in discovery mechanisms to identify and register connected data-sources.
The Projects field at the top of your HiveMQ Pulse navigation provides access to all HiveMQ Pulse projects on your system.
To get you started, a HiveMQ Pulse project with the same name as your HiveMQ Cloud organization is immediately available when you open your HiveMQ Pulse deployment:
-
To view or edit project details, select Project Settings next to the project name.
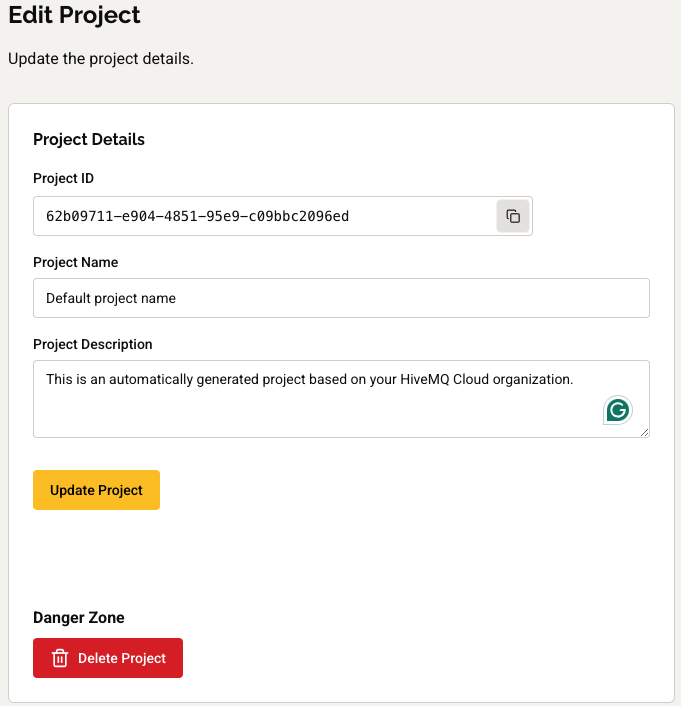
To save your changes, select Update Project.
| The Edit Project page also provides an action to delete your HiveMQ Pulse project. After a confirmation request, the Delete Project action permanently removes the HiveMQ Pulse project. This action cannot be undone. |
-
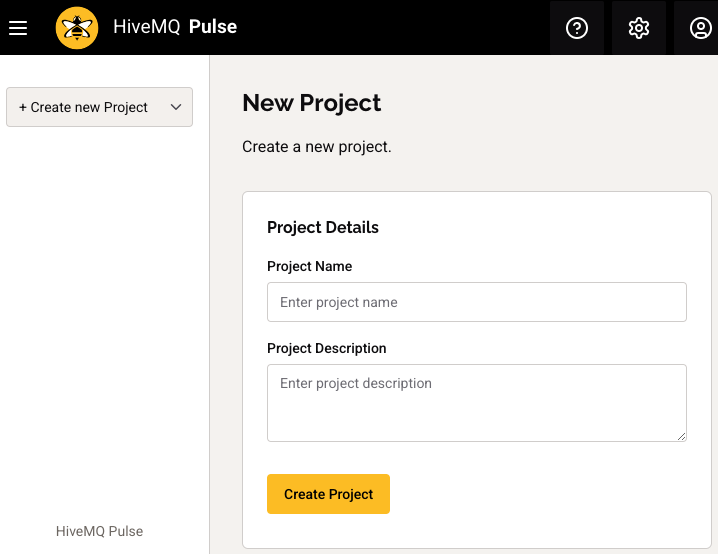
To open a window where you can add another HiveMQ Pulse project, select + Create new Project from the projects drop-down menu:
-
On the New Project page, you can enter a name and brief description for the new project. To save your changes and add the project to the list projects menu, select Create Project.
| Currently, each HiveMQ Pulse deployment supports a maximum of three projects. |
Connect Infrastructure to HiveMQ Pulse
When you connect infrastructure in HiveMQ Pulse, you establish a link between HiveMQ Pulse and infrastructure components that include a Pulse Agent, such as your HiveMQ Enterprise MQTT brokers or your HiveMQ Edge deployments. This connection allows HiveMQ Pulse to access live data flows, discover existing MQTT topics, and integrate data sources into your HiveMQ Pulse namespace for modeling, monitoring, and governance.
-
To open the Infrastructure view of your HiveMQ Pulse project, select the Infrastructure the HiveMQ Pulse main navigation:
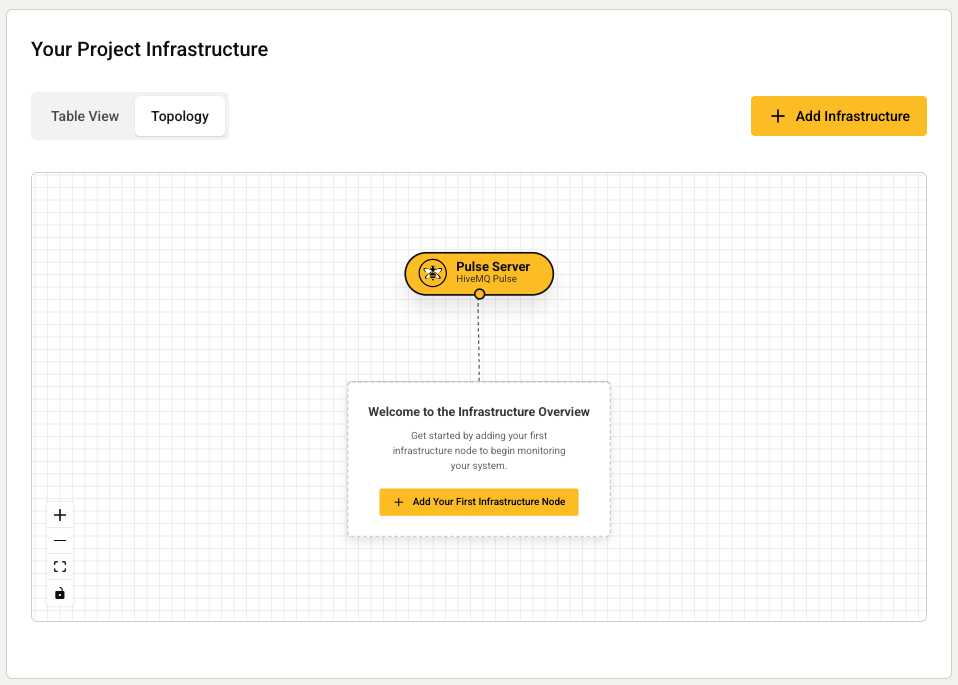
The Infrastructure view offers two ways to visualize your HiveMQ Pulse deployment.
As you connect infrastructure, the components you add are visualized in the following ways:-
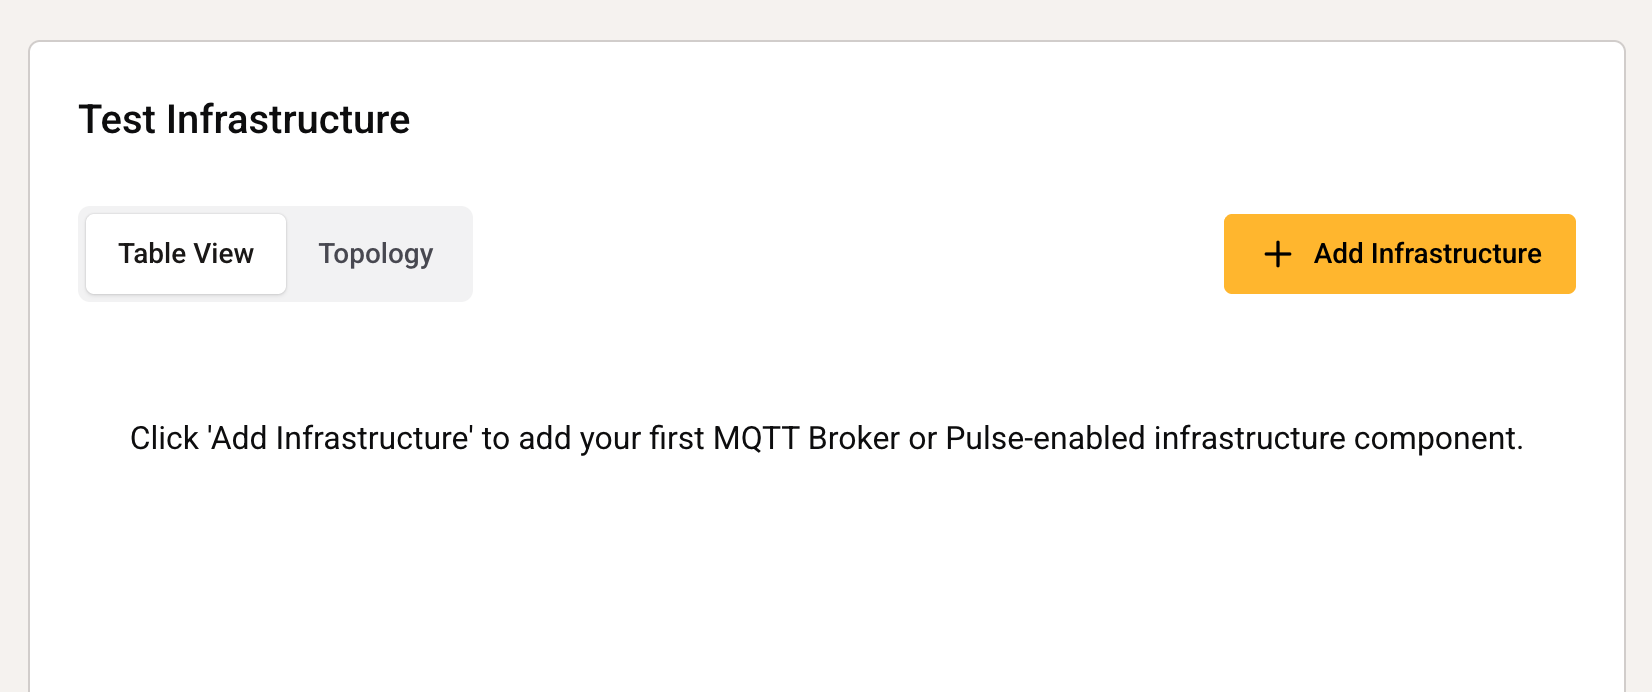
Table View: The table view is optimised for easy management of all of your connected infrastructure and provides a clear overview of the current state.
-
Topology: The topology view is designed to help you understand the relationships between your connected brokers and other infrastructure components.
-
-
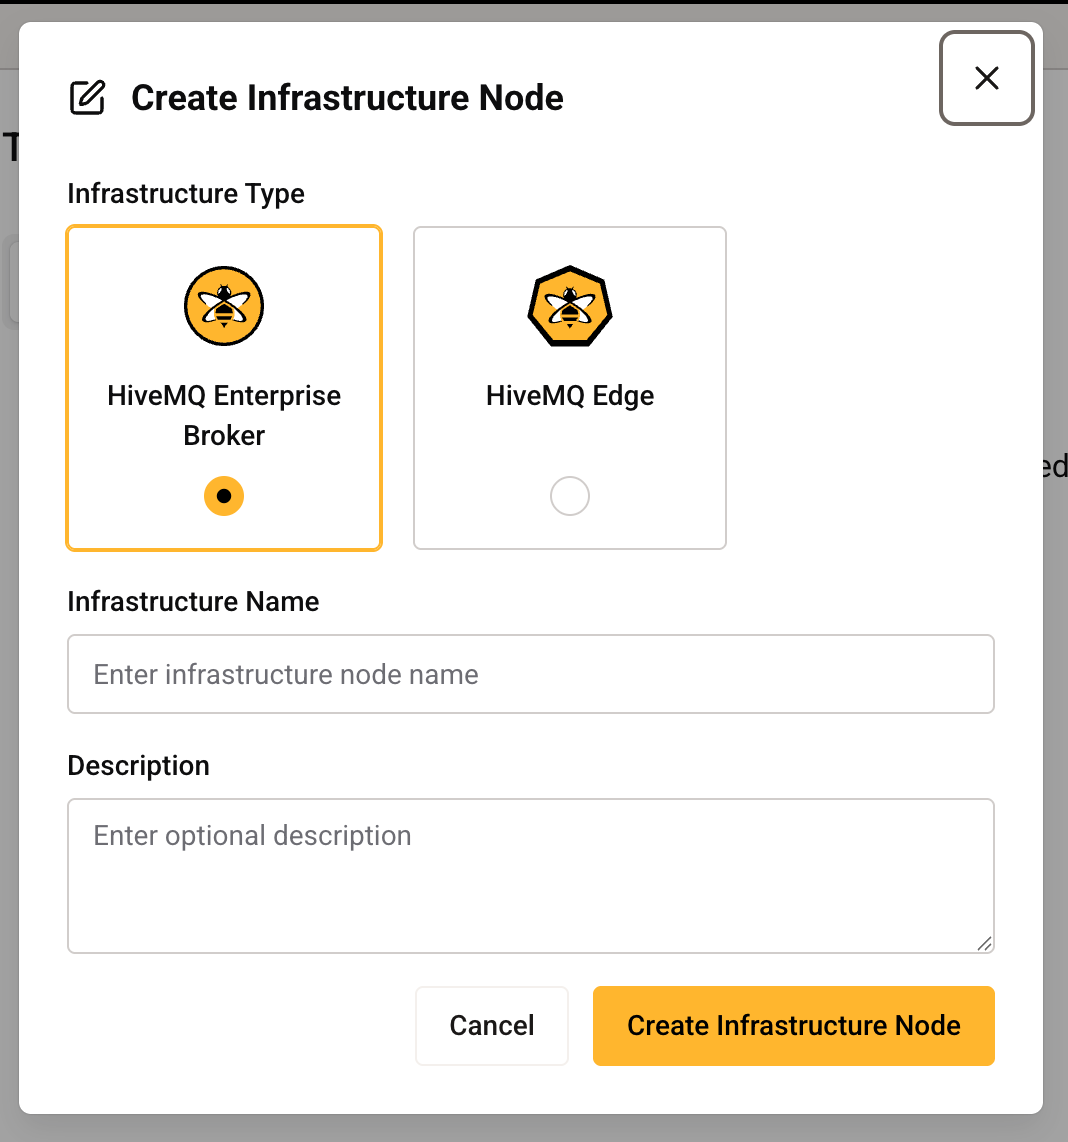
To open a dialog where you can create a new infrastructure component, select Add Infrastructure.
-
On the Create Infrastructure Node dialog, select the type of infrastructure you want to connect and enter an Infrastructure Name and Description. The name and description can be edited later.
-
To save your changes and add the component, select Create Infrastructure Node.
| To connect to HiveMQ Pulse, the infrastructure component must contain a HiveMQ Pulse agent. Currently, only HiveMQ Enterprise MQTT brokers and HiveMQ Edge brokers are supported. |
-
Once added, your new infrastructure component appears on the infrastructure table and topology views. The newly-created infrastructure component is shown in a Draft state.

-
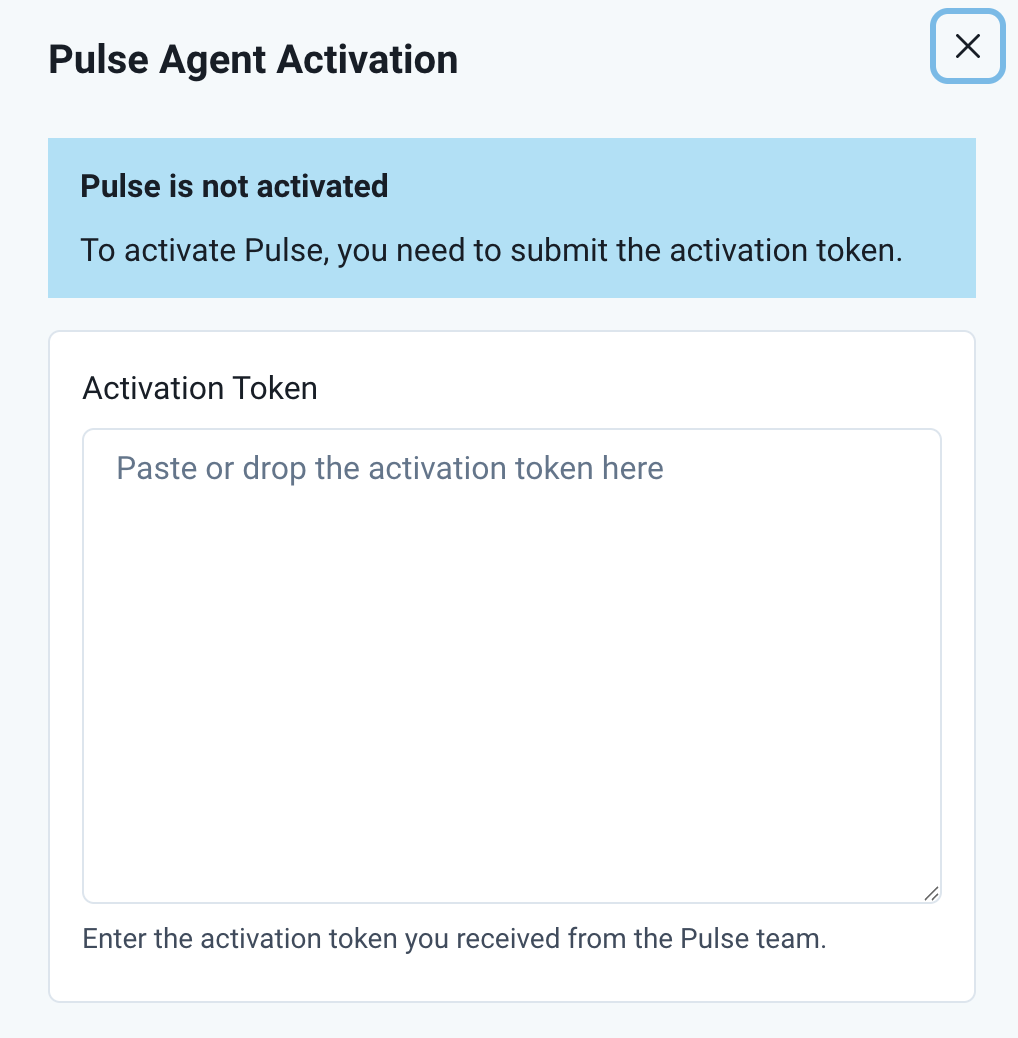
To establish the connection, you must provide your HiveMQ Edge or HiveMQ Enterprise broker with a HiveMQ Pulse activation token.
-
To access the activation token of the newly created infrastructure component on your Infrastructure table view, select the Connect Infrastructure Node icon in the Actions column of the component.
-
To access the activation token of the newly created infrastructure component on your Infrastructure topology view, expand the component card and select the Connection option.
-
-
Copy the provided Activation Token and proceed to provision your HiveMQ Edge broker or HiveMQ Enterprise MQTT broker as follows.
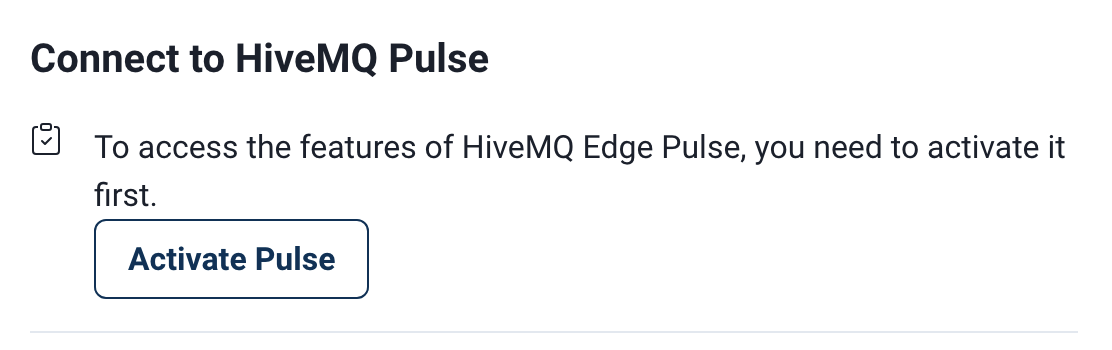
Provision a HiveMQ Edge Broker for Connection to HiveMQ Pulse
-
To provision your HiveMQ Edge broker, navigate to the Pulse section on the Home screen of your HiveMQ Edge installation, and select Activate Pulse.
-
In the provided input box, paste the Activation Token you copied from the HiveMQ Pulse Infrastructure view, and select Activate.
In the background, your HiveMQ Edge Pulse Agent automatically connects to the HiveMQ Pulse service.
-
When the activation is detected, the state of the HiveMQ Edge broker on the HiveMQ Pulse Infrastructure view updates to Connected. The activation can take a few minutes to process.
-
After the connection is established, data transmitted through your HiveMQ Edge broker becomes visible in the Discovery view of your HiveMQ Pulse deployment. For more information, see Discover Data Sources.
Provision a HiveMQ Enterprise Broker for Connection to HiveMQ Pulse
-
To provision your HiveMQ Enterprise broker, you need to provide your Activation Token in the Pulse configuration file of your HiveMQ installation located at
[HIVEMQ DIRECTORY]/pulse/conf/config.xml.
<pulse>
    <enabled>true</enabled>
    <bootstrap>true</bootstrap>
    <agent>
        <connection-string>(Your Activation Token)</connection-string>
    </agent>
</pulse>| You must restart your broker for the activation token to take effect. |
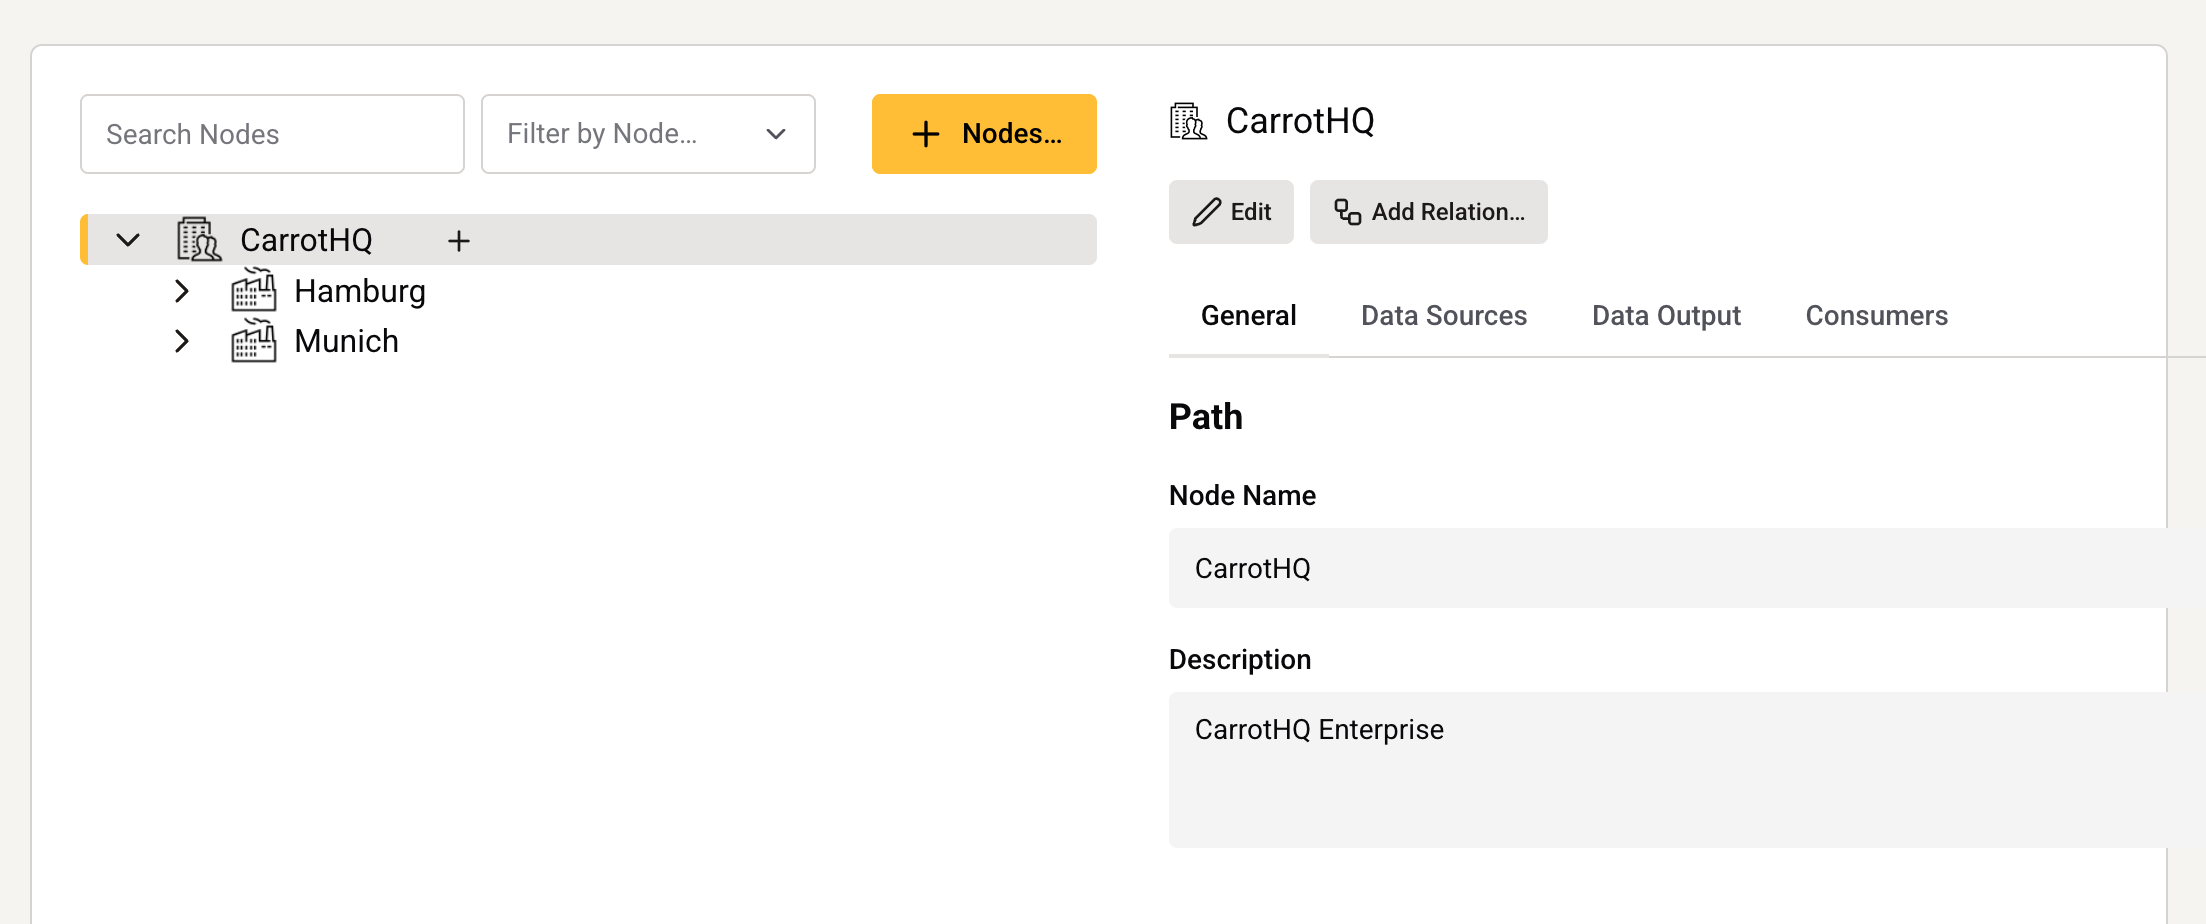
Build Your Namespace
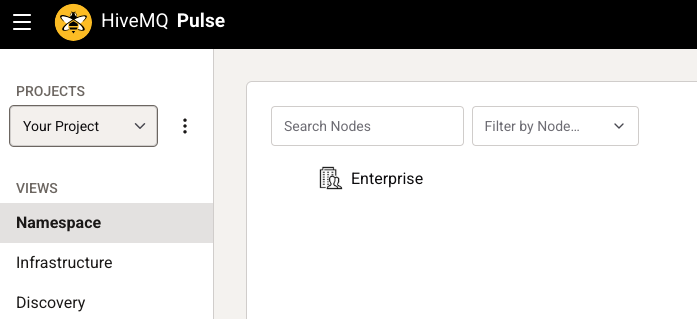
The Namespace of your new HiveMQ Pulse project is automatically populated with an Enterprise node. This node is the root element of your namespace.
|
Approaches to Namespace Design
In HiveMQ Pulse, a namespace serves as the conceptual model that organizes and contextualizes your data. There are two primary approaches to building and managing your namespace in HiveMQ Pulse:
Top-down and bottom-up approaches to namespace development can be combined. For example, start with discovery to accelerate onboarding and then refine the model with top-down adjustments for governance and long-term manageability. In this guide, we start out with a top-down approach to build the namespace. |
-
To open a panel where you can add or edit basic information about the provided Enterprise node, select the node name on the Namespace view:

-
On the General tab of the Namespace view, select Edit to enter an appropriate name and description for the provided Enterprise node.
-
In the MQTT Topic field, specify the MQTT topic where HiveMQ Pulse ingests messages for this Enterprise node. The MQTT topic associated with the Enterprise node groups MQTT traffic for the enterprise under a common, hierarchical entry point. This MQTT topic defines the root prefix for all data flows that belong to the selected enterprise.
-
To save your changes, select Update Node.
Add Nodes to Your Namespace
-
To add new nodes to your namespace, select the node you wish to use as the parent node.
-
You can use either the + Nodes option in the namespace toolbar or the + element next to the node name to open a list of the child node types the selected parent node type supports.
For a full list of the child note types permitted for each node type, see HiveMQ Pulse Node Types.
-
After you select the node type you want to add, a panel to enter details opens. The required fields vary based on the selected node type. The Name field is required for all node types. For detailed information on all available note types, see HiveMQ Pulse Node Types.
-
To add the node to your namespace structure, select Create Child Node.
As you add nodes to your namespace, the Namespace entry adjusts to show the location of the node within the namespace hierarchy.
| The currently available HiveMQ Pulse node types are based on the ISA-95 standard and provide the core elements required to build an ISA-95-compliant namespace. Additional node types and the ability to define custom node types with organization-specific constraints and behavior are planned for upcoming releases. |
Discover Data Sources
In addition to building a namespace manually, you can discover existing data from connected infrastructure and use it to shape your namespace design.
-
To get started, ensure your broker is connected and select Discovery in the main navigation.
-
In the Actions menu of the connected infrastructure on which you want to discover new data sources, select View.
Newly discovered MQTT data sources on the selected component are listed as ungoverned MQTT traffic and grouped by topic.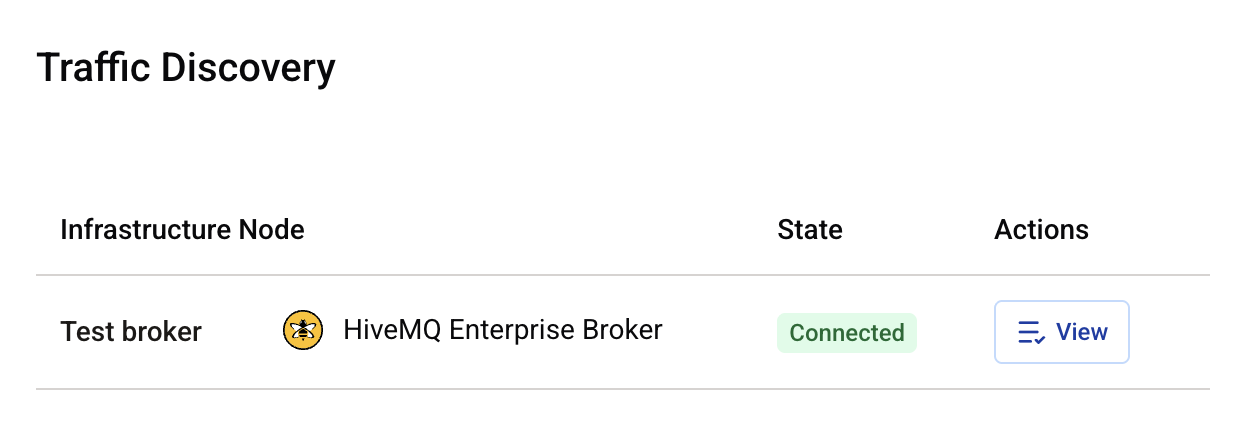
-
To access the details of a discovered MQTT data source, select the topic in the list of Ungoverned MQTT Traffic.
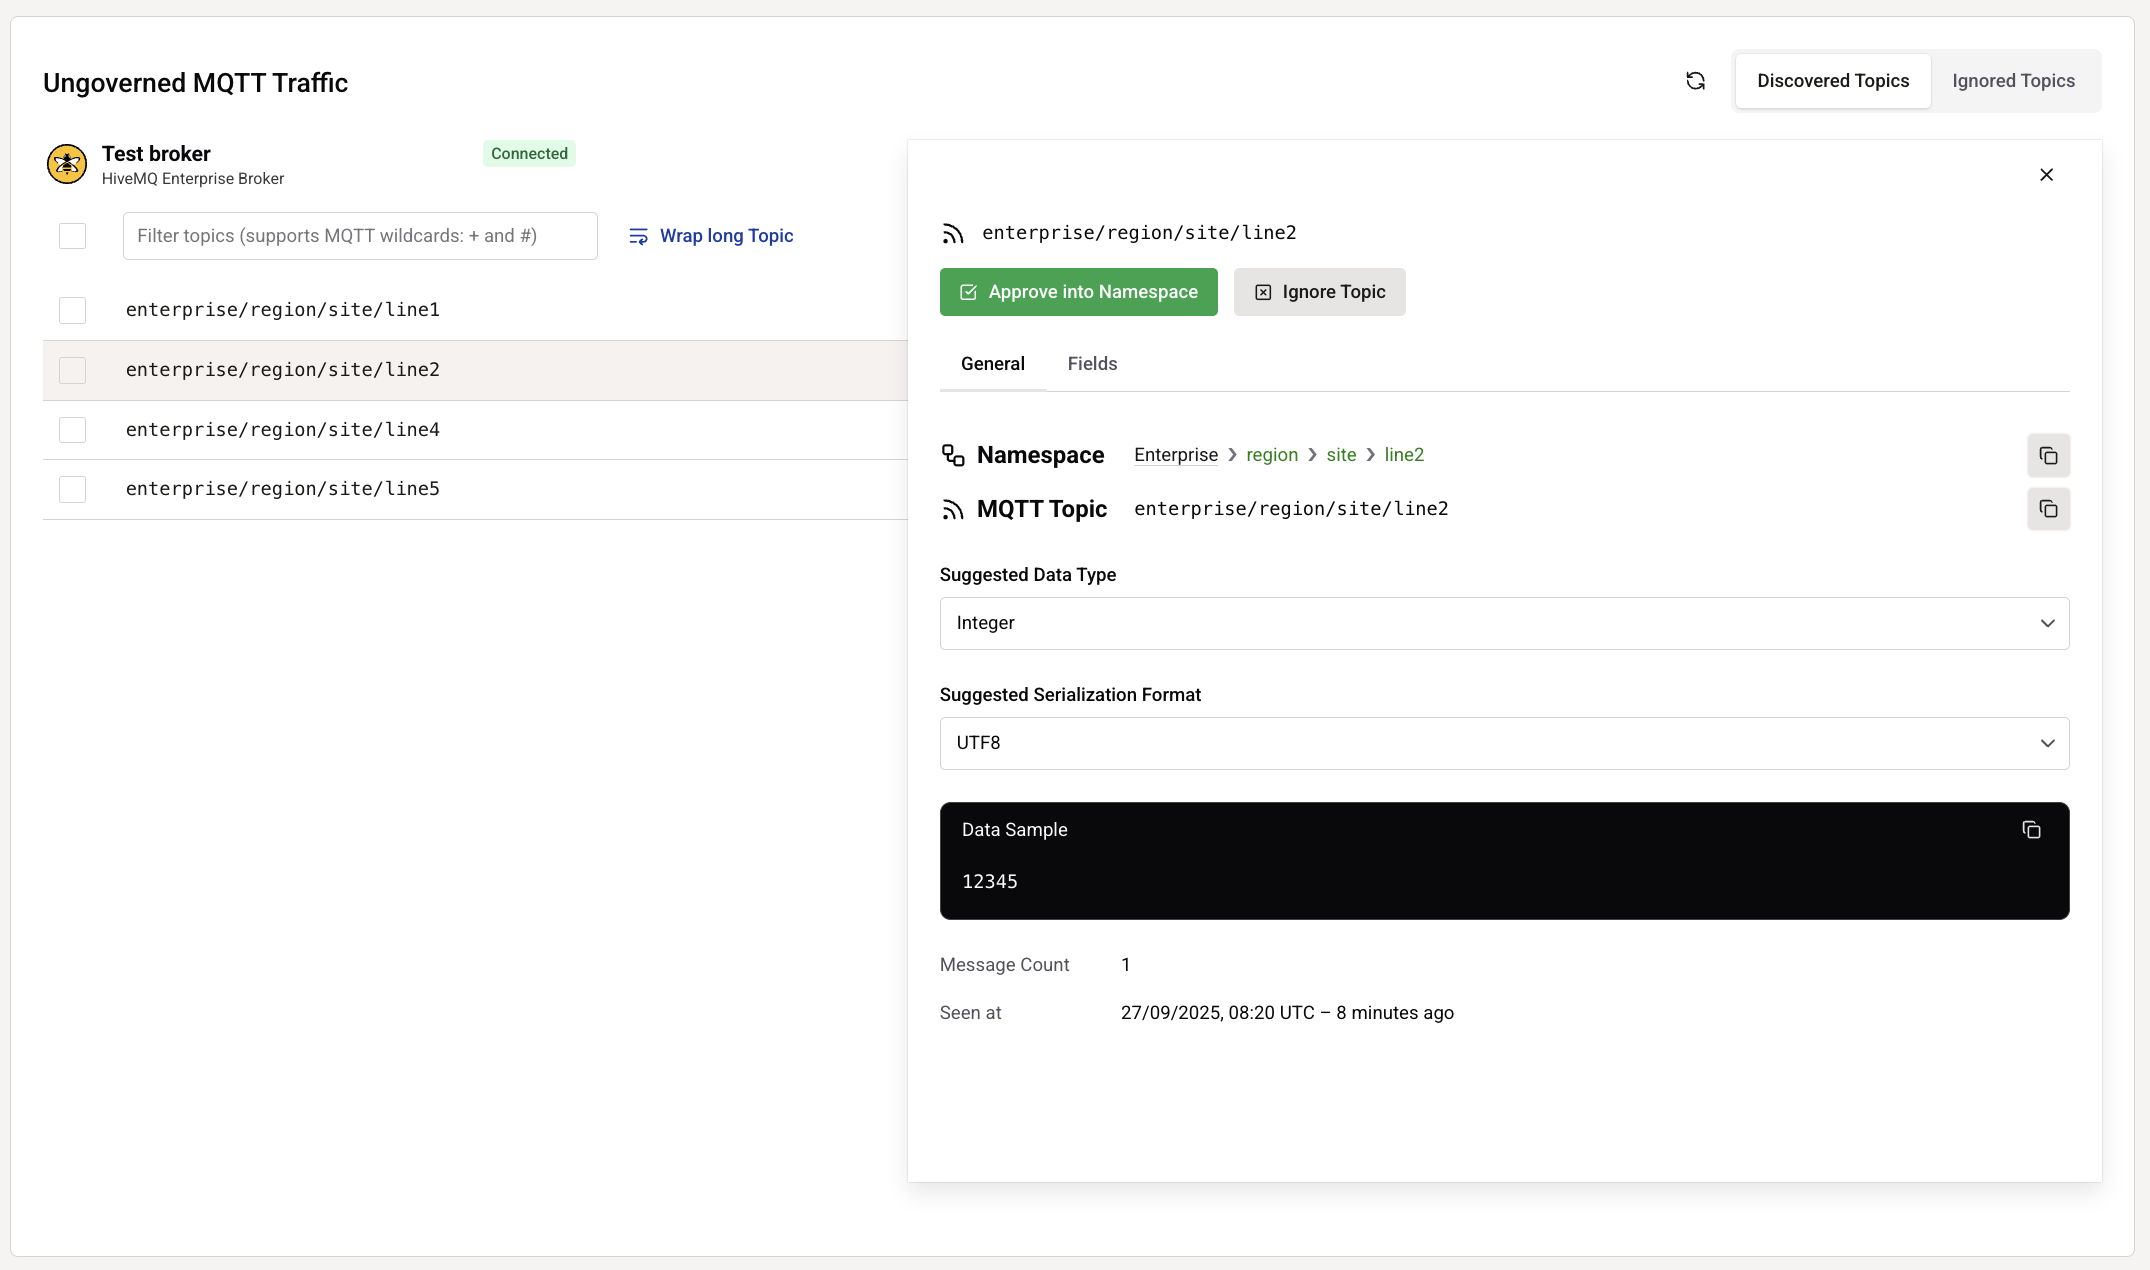
Approve Data Sources
When you approve a discovered data source, a new element is created in your namespace with the associated metadata.
Discovery provides data source details such as the number of messages observed on the MQTT topic and the timestamp of the last payload.
HiveMQ Pulse also generates a suggested data type and serialization format for the namespace element to be created upon approval. Both of these values can be adjusted based on your knowledge of the data source. Additionally, a sample payload from the new discovered data is displayed to support your decisions.
| All settings remain editable after approval. |
Any new parent elements added to your namespace are highlighted in green in the Namespace path entry:

When a discovered data source includes a complex payload, such as a JSON object, a Fields tab appears. The Field tab lists the elements in the payload stored in your namespace as fields and their auto-selected types.
| Field types cannot be edited during approval, but they can be modified individually once the data source has been added to the namespace. |
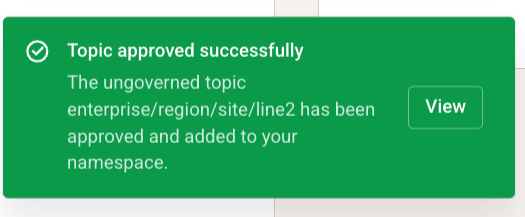
When you approve a data source, a notification appears and the selection automatically advances to the next element in the Discovery list.
| For quick navigation, the approval notification contains a direct link to the newly created namespace element. |