Getting Started with the HiveMQ Enterprise MQTT Broker
The HiveMQ Enterprise MQTT Broker is part of the HiveMQ Platform, an MQTT-based industrial AI platform.
This guide shows you how to create a free HiveMQ account on the HiveMQ Platform, run your first broker, and send and receive MQTT messages.
The guide uses the self-managed HiveMQ software option with a HiveMQ Lab License.
The Lab license is a free 30-day license for running a self-hosted HiveMQ Enterprise Broker in non-production environments.
During the license period, enterprise extensions run without a runtime limit. The Lab license also includes free access to Data Intelligence functionality, up to the free allowance.
More ways to get started:
-
To learn about all the features that the HiveMQ Platform offers, including ways to operationalize your data for AI-driven actions, see Getting Started with the HiveMQ Platform.
-
To connect your existing HiveMQ brokers to the HiveMQ Platform, see Connect Your Existing HiveMQ Broker or Edge Instance
-
To start on HiveMQ Cloud, see Getting Started with HiveMQ Cloud.
Sign up and log in to HiveMQ
-
Navigate to hivemq.com:

-
On the HiveMQ homepage, click Try HiveMQ.
-
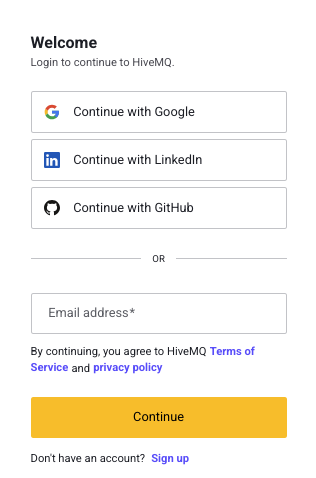
The first time you use HiveMQ, select a login method and sign up. You can use your GitHub, Google, or LinkedIn account, or your email address:
-
Email: HiveMQ sends a verification code to your email address. Enter the code and click Verify email. If you do not receive the code, click Resend code. Then set a secure password and click Create account.
-
GitHub, Google, or LinkedIn: The provider supplies your login data.
-
-
To complete your sign-up, enter basic contact details for your user profile and click Continue:
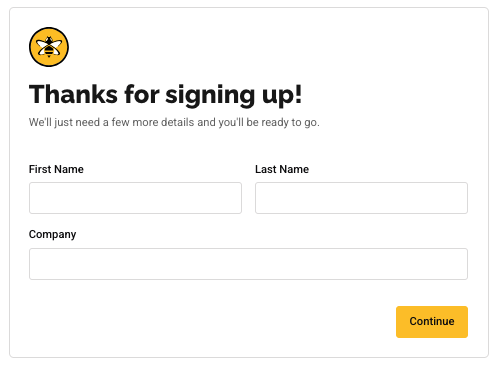
Your account opens in the HiveMQ Platform at app.hivemq.com.
For future visits, log in directly with the method you selected.
| HiveMQ is retiring the legacy HiveMQ console (console.hivemq.cloud). During a transition period, existing accounts can switch to the legacy console from the HiveMQ Platform interface. |
Get HiveMQ running on your infrastructure
After you complete your sign-up, a welcome screen shows the ways to start with HiveMQ.
-
On the Download HiveMQ Software card, click Continue.
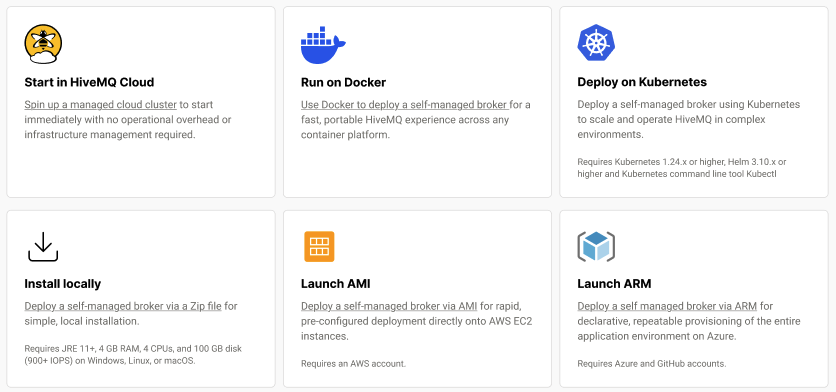
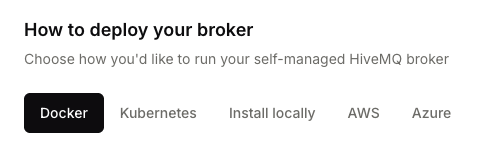
When you select the software option, a page to choose how to deploy your self-managed HiveMQ Enterprise MQTT broker opens:
-
Click the method you prefer.
-
Follow the steps shown on the HiveMQ Platform interface, or go to the matching section of this guide:
Option Best for Action Quick local testing and development
Container orchestration environments
Local deployment and testing on a server or computer of your choice
AWS and Azure infrastructure
Run HiveMQ on Docker
Docker is one of the simplest ways to try HiveMQ and MQTT. To learn more about HiveMQ clustering with Docker and using Docker and HiveMQ in production, see HiveMQ on Docker Hub and the HiveMQ User Guide.
Requirements
-
A running Docker installation.
-
A Bash shell to run the sample data script.
Start Your Broker on Docker
-
On the How to deploy your broker page, select Docker.
HiveMQ automatically generates a license key for a free Lab license package with Pending deployment status. The license name and details appear in the Your License section. -
In the Run the container section, click the copy icon next to the command.
The command sets your license key as an environment variable and starts the broker. The command contains the license key information for the currently selected license. You do not need to manually edit the command. -
Open a terminal window and run the command you copied.
-
When your broker starts, click View broker.
On your new broker page, a Broker connected! notice confirms your broker is connected to the platform with Data Intelligence enabled. To continue the platform onboarding flow, select Next, get data flowing.
|
After your HiveMQ broker starts, you can connect any MQTT client to it on port 1883. This guide shows you how to turn on simulated telemetry for your new broker. Simulated telemetry is sample device data, such as machine states and throughput values. The script uses the HiveMQ MQTT CLI to generate the data. The MQTT CLI is part of the HiveMQ software bundle. You only need a Bash shell to run the script. With sample data, you can try Contextualize in the HiveMQ Platform before you connect your own devices. |
Send Sample Data to Your Broker
-
On the Get data flowing page, select Use simulated data option and switch to the Docker tab, if it is not already open.
-
Click the copy icon next to the provided script.
-
Open a new terminal window and run the script you copied. It can take a minute for your broker to register the traffic. Leave the script running.
After a minute, a Data is flowing! notice confirms that data reaches your broker.
To continue the platform onboarding flow, go to Explore Your Data.
Deploy HiveMQ on Kubernetes with the HiveMQ Platform Operator for Kubernetes
The HiveMQ Platform Operator for Kubernetes is a tool for managing your HiveMQ broker deployments in a Kubernetes environment. The operator makes it easy to install, scale, configure, and monitor HiveMQ Enterprise MQTT Brokers and HiveMQ Enterprise Extensions in a versatile, adaptable manner.
Requirements:
-
Kubernetes 1.24.x or higher.
-
Helm 3.10.x or higher.
-
Kubernetes command line tool Kubectl.
-
On the How to deploy your broker page, select Kubernetes.
-
HiveMQ automatically generates a license key for a free Lab license package with Pending deployment status.
The license name and details appear in the Your License section. -
Select Install the HiveMQ Platform Operator with Helm.
-
Use the copy icon next to the command to add the HiveMQ Helm repository to your local Helm setup and install the HiveMQ Platform Operator.
-
Open a terminal window, run the command you copied, and press Enter.
-
Select Install HiveMQ Platform.
-
Click the copy icon to copy the first command.
-
Open a terminal window, run the command you copied, and press Enter.
For additional setup options, see the configuration guide.
-
To reach the platform from your machine, use the copy icon next to the command to create a port-forward.
-
Open a terminal window, run the command you copied, and press Enter.
The Control Center is then available at
http://localhost:8080with the default login credentialsadmin/hivemq. MQTT clients can connect on port 1883. -
Select Enable Data Intelligence.
-
To enable Data Intelligence, click the copy icon to copy the provided command.
-
Open a terminal window, run the command you copied, and press Enter.
The command creates a Secret named
hivemq-pulse-configurationthat holds the configuration. The--reuse-valuesoption keeps the license key you set in the previous step.
-
Your broker is now connected to the HiveMQ Platform with Data Intelligence enabled.
Next Steps
Learn more about the HiveMQ Platform Operator for Kubernetes and how to use the Helm package manager to bootstrap the deployment and management of your HiveMQ Enterprise MQTT broker.
Install HiveMQ Locally on a Server or Computer of Your Choice
Use this option to run a self-managed HiveMQ Enterprise MQTT Broker from a convenient ZIP download package.
Requirements
-
Windows, Linux, or macOS.
-
OpenJDK JRE 21.x.x or 25.x.x.
-
4 GB RAM, 4 CPUs, and 100 GB disk (900+ IOPS). For more information, see HiveMQ System Requirements.
Start Your Broker Locally
-
On the How to deploy your broker page, select Install locally.
-
HiveMQ automatically generates a license key for a free Lab license package with Pending deployment status.
The license name and details appear in the Your License section. -
In the Download HiveMQ section, click Download the HiveMQ ZIP.
-
In the Install and start the broker section, select Install on Linux/macOS or Install on Windows.
-
Click the copy icon to copy the provided installation command. The command includes your license key and does not need to be edited.
-
Open a terminal window and run the command you copied.
-
When your broker starts, click View broker. The startup can take a few minutes.
On your new broker page, a Broker connected! notice confirms your broker is connected to the HiveMQ Platform with Data Intelligence enabled.
By default, the HiveMQ broker starts on the localhost IP address (127.0.0.1) and listens on port 1883.
To learn more about HiveMQ broker installation, see General HiveMQ Broker Installation Information.
To continue the platform onboarding flow, select Next, get data flowing.
|
After your HiveMQ broker starts, you can connect any MQTT client to it on port 1883. This guide shows you how to turn on simulated telemetry for your new broker. Simulated telemetry is sample device data, such as machine states and throughput values. The script uses the HiveMQ MQTT CLI to generate the data. The MQTT CLI is part of the HiveMQ software bundle. You only need a Bash shell to run the script. With sample data, you can try Contextualize in the HiveMQ Platform before you connect your own devices. |
Send Sample Data to Your Broker
-
On the Get data flowing page, select the Use simulated data option and switch to the Local installation tab.
-
In the Publish Sample data section, click the copy icon next to the provided script.
-
Open a new terminal window and go to your HiveMQ installation folder. The ZIP file extracts to a folder named
hivemq-<version>. The installation folder contains thebinandtoolsfolders. The script finds the MQTT CLI only when it runs from this folder. -
Save the script from your clipboard to a file:
-
macOS: Run
pbpaste > simulate-data.sh. -
Linux and WSL: Run
cat > simulate-data.sh, paste the script, press Enter, and then press Ctrl+D.
-
-
Run the script, and leave it running:
bash simulate-data.sh
The script prints status messages such as 40 topics under DemoCorp/Site01/Production/#.
After a minute or two, a Data is flowing! notice confirms that data reaches your broker. To continue the platform onboarding flow, go to Explore Your Data.
Explore Your Data
After MQTT traffic reaches your broker, you can work with the data in the Contextualize layer of the HiveMQ Platform.
The simulated data appears as Ungoverned MQTT Traffic on the Discovery tab of Contextualize.
-
On your broker page, click Govern data.
-
Follow the online tour to see how Discovery, Namespace, and Data Models work.
The simulated data appears as Ungoverned MQTT Traffic on the Discovery tab of Contextualize.
The tour also introduces the Analyze layer, where you can review Data Health and Deviations.
Act on Your Data
| Act is in public preview. Features and behavior can change before general availability. |
After you generate and explore your data, you can use the Act layer of the HiveMQ Platform to turn your data into AI-driven actions.
-
Follow the online tour to see how agents work.
The tour introduces the Marketplace, Templates, Deployed Agents, and Networks areas of the Act layer.
Connect Your Own MQTT Clients to Your HiveMQ Broker
After you explore the sample data, you can connect your own MQTT clients to the broker on port 1883. This section uses the MQTT CLI, an open-source MQTT client that is part of the HiveMQ software bundle.
The commands assume that the MQTT clients and the broker run on the same machine.
If they run on different machines, replace localhost with the address of your broker.
|
Start the MQTT CLI
-
Open a terminal window, and start the MQTT CLI in shell mode. The command depends on how you run HiveMQ:
-
Install locally (Linux/macOS): In your HiveMQ installation folder, run
./tools/mqtt-cli/bin/mqtt shell. -
Install locally (Windows): Install the Windows MQTT CLI. In the extracted folder, run
.\mqtt-cli.exe shell. -
Docker: Run
docker exec -it hivemq /opt/hivemq/tools/mqtt-cli/bin/mqtt shell. -
Kubernetes: Keep the port forward running, and use any MQTT client on your machine, such as a local installation of the MQTT CLI.
-
Connect Two MQTT Clients
-
In the first terminal window, connect a client with the identifier
testClient1:con -h localhost -i testClient1 -
Open a second terminal window, and start the MQTT CLI again.
-
In the second window, connect a client with the identifier
testClient2:con -h localhost -i testClient2
Send and Receive a Message
-
In the second window, subscribe
testClient2to the topictestTopic:sub -t testTopic -sThe
-soption keeps the console open, so incoming messages appear in the window. -
In the first window, publish the message
HellototestTopic:pub -t testTopic -m Hello
The message Hello appears in the second window.
View Your MQTT Clients and Topics
-
HiveMQ Platform: On the Discovery tab of Contextualize, the topic
testTopicappears next to the sample data topics. -
HiveMQ Control Center: Go to http://localhost:8080/v2^, and log in with the username
adminand the passwordhivemq. To see the two clients, open the Clients view. For more information, see Monitor Client Activity on the HiveMQ Control Center.
Monitor Client Activity on the HiveMQ Control Center
The HiveMQ Control Center provides a wide range of metrics that help you manage and analyze your HiveMQ installation.
Navigate with your browser to http://localhost:8080/v2.
If you see the login dialog for the HiveMQ Control Center, HiveMQ is up and running.
The default login credentials are: user: admin, password: hivemq.
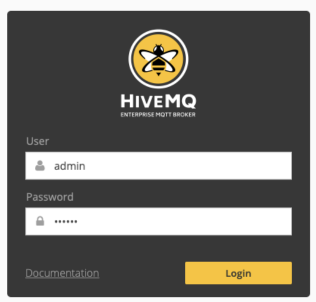
The detailed information the control center provides helps you maintain a clear overview of your HiveMQ installation and quickly identify irregular client behavior.
-
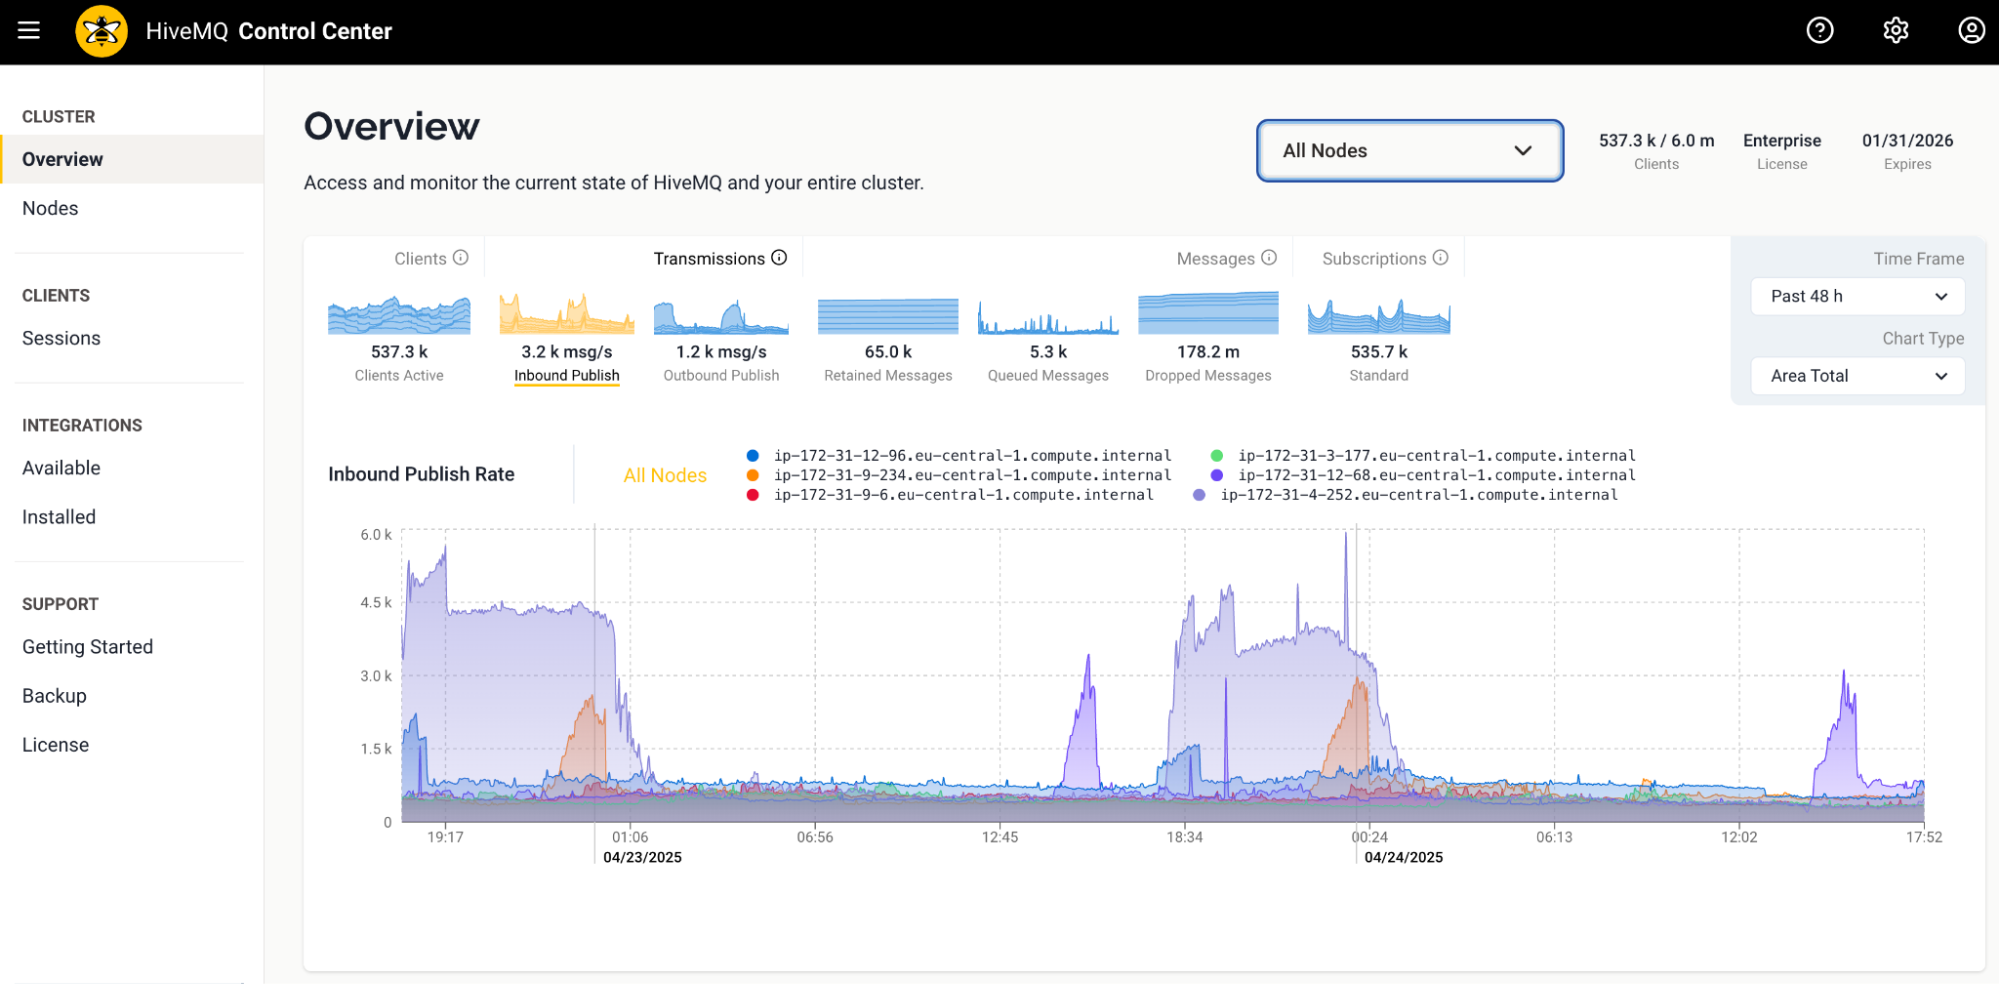
Check the Control Center Dashboard to see the client activity that you just created:
-
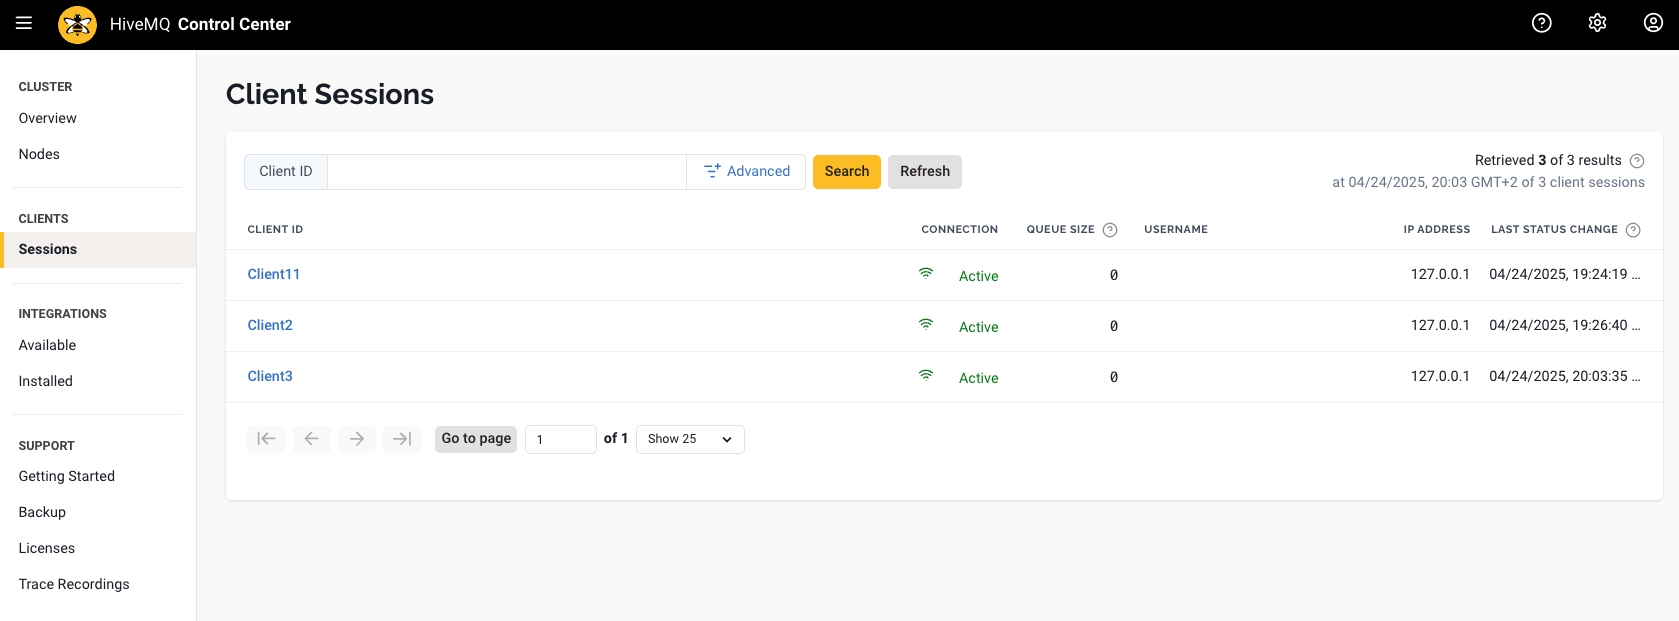
To view more information on the two MQTT clients that you just connected, switch to the Clients overview:
Next Steps
-
To learn more about the HiveMQ Control Center offers, see HiveMQ Control Center.
-
To learn more about the MQTT CLI, see MQTT CLI.
Launch HiveMQ on Your Own AWS or Azure Infrastructure
-
HiveMQ on Amazon Web Services (AWS):
-
HiveMQ on Microsoft Azure:
Deploy HiveMQ on Amazon Web Services (AWS EC2 Quick-Launch)
Our pre-built Amazon Machine Images (AMI) let you deploy a HiveMQ trial instance on AWS EC2 with ease.
The HiveMQ Quick-Launch installation sets up a fully operational HiveMQ AWS EC2 instance in your AWS account.
For complete step-by-step instructions from selecting the right AMI to launching your HiveMQ AWS EC2 instance, see Quick-Launch HiveMQ on an AWS EC2 instance.
Next Steps
To learn how to launch a production-ready HiveMQ cluster on AWS EC2, see Build an Elastic High-Availability HiveMQ Cluster on AWS EC2.
Deploy HiveMQ on an Amazon Web Services (AWS) Windows Server 2022 Amazon EC2 Instance
Requirements
-
Amazon Web Services account.
-
A remote desktop client, such as Microsoft Remote Desktop App for Mac.
Launch an Amazon EC2 Windows Instance
-
Log in to your AWS account and navigate to the EC2 console.
-
From the EC2 console dashboard, in the Launch instance box, click Launch instance.
-
Enter a descriptive name for your new instance. For example, HiveMQ Windows Server.
-
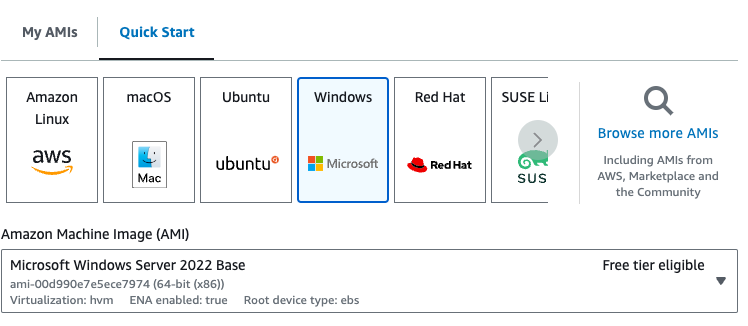
Select the Windows image:
-
Select an instance type that meets the minimum configuration requirements for a HiveMQ installation. In this guide, we use the
t2.xlargeinstance type with 4 vCPU and 16 GB RAM with at least 100 GB of available disk space.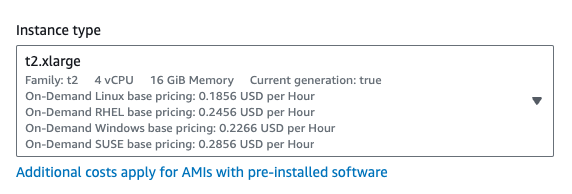
-
Create and download a new key pair for use later to securely connect to your instance. Ensure you have access to the key pair before you launch the instance.
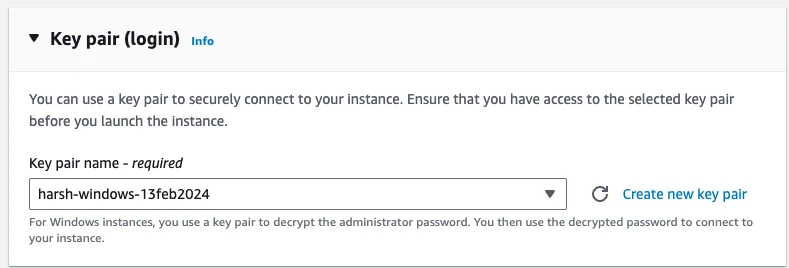
Do not choose Proceed without a key pair. If you launch your instance without a key pair, you cannot connect to the instance. -
Select the RDP Client connection option to allow Remote Desktop Protocol (RDP) traffic to the server.
Replace Anywhere with a custom IP for increased security.
-
Add storage for your HiveMQ instance. In this example, the minimum value of 100 GB is used.
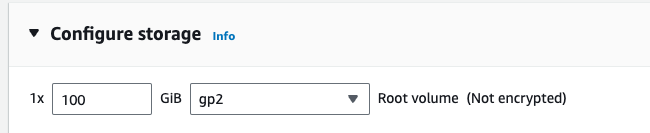
To complete your installation, click Launch Instance.
A confirmation page verifies that your instance is launching. Click View all instances to close the confirmation page and return to the console.
Connect to the Amazon EC2 Windows Instance
-
Open the Amazon EC2 console.
-
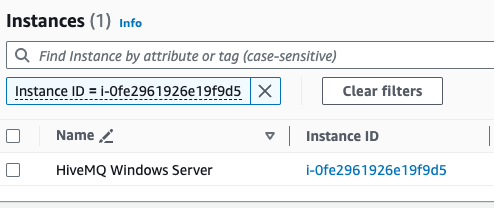
In the navigation pane, click Instances and find your instance.
-
Select the instance and click Connect.

-
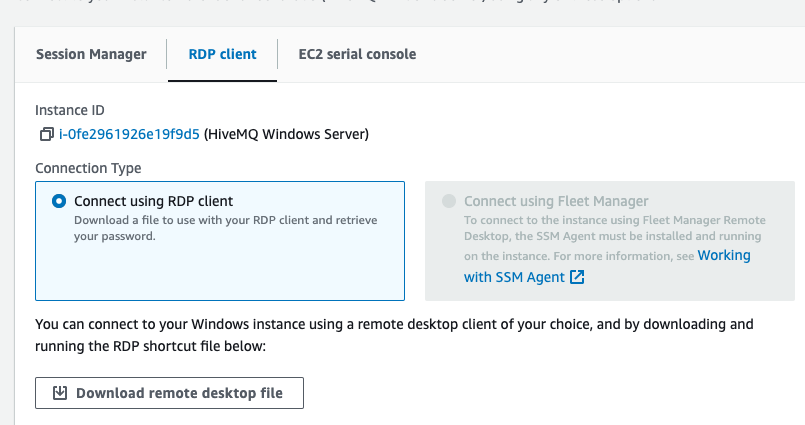
On the Connect to instance page, switch to the RDP client tab and download the remote desktop file.
-
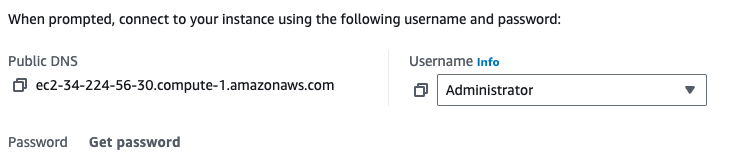
Enter the default username: Administrator and click Get Password.
-
Upload the private key from the last steps and note the password; this is your login password for Windows.
-
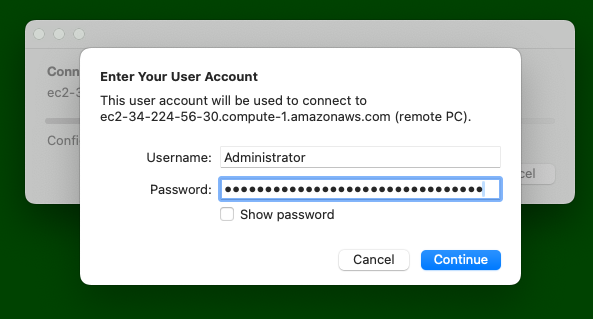
Double-click the remote desktop file and connect with your Windows password.
-
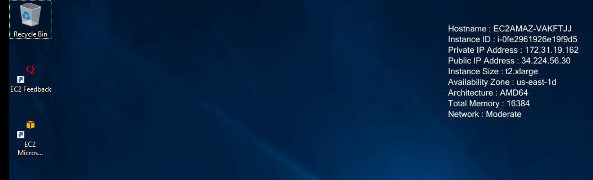
A confirmation message similar to the following verifies that Windows is up and running.
Next Steps
Download and install the latest version of the open source MQTT CLI tool for Windows and test your HiveMQ broker installation.
Deploy HiveMQ on Azure with an ARM Quickstart Template
Azure Resource Manager is the deployment and management service for Azure.
A resource manager template is a JSON file that defines one or more resources to deploy to a resource group, subscription, management group, or tenant.
The template can be used to deploy resources consistently and repeatedly.
The HiveMQ Virtual Machines Cluster ARM template deploys a cluster of HiveMQ virtual machines to Azure with the number of HiveMQ instances you select. Each HiveMQ instance (node) is one virtual machine. The template installs the HiveMQ Azure Cluster Discovery Extension on each node. The extension enables HiveMQ cluster nodes to discover each other dynamically through regular information exchange via Azure blobs in an Azure blob-storage container.
The hivemq-vm-cluster ARM quickstart template automates deployment of the following resources to Azure:
-
One or more virtual machines preinstalled with HiveMQ and the HiveMQ Azure Cluster Discovery Extension
-
An Azure Storage Account for the extension to use
-
An Azure Availability Set in which the virtual machines are located
-
An Azure load balancer to access the HiveMQ services
-
A virtual network in which the virtual machines and the load balancer are located
-
Network interfaces with public IP addresses for the virtual machines
-
A network interface with a public IP address for the load balancer
Deploy Your HiveMQ Cluster with an ARM Quickstart Template
| Before you start, ensure the sign-in information for your Microsoft account is available. |
-
Go to the HiveMQ Azure Cluster Discovery repository on GitHub and select
arm-quickstart-templates/hivemq-vm-cluster. -
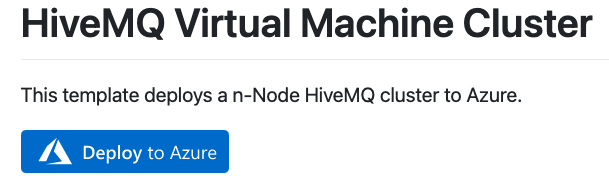
On the HiveMQ Virtual Machine Cluster page, click Deploy to Azure:
-
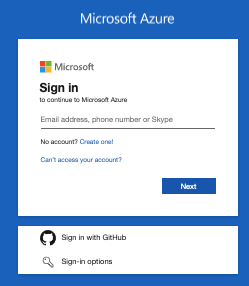
A window to sign in to your Microsoft account opens:
-
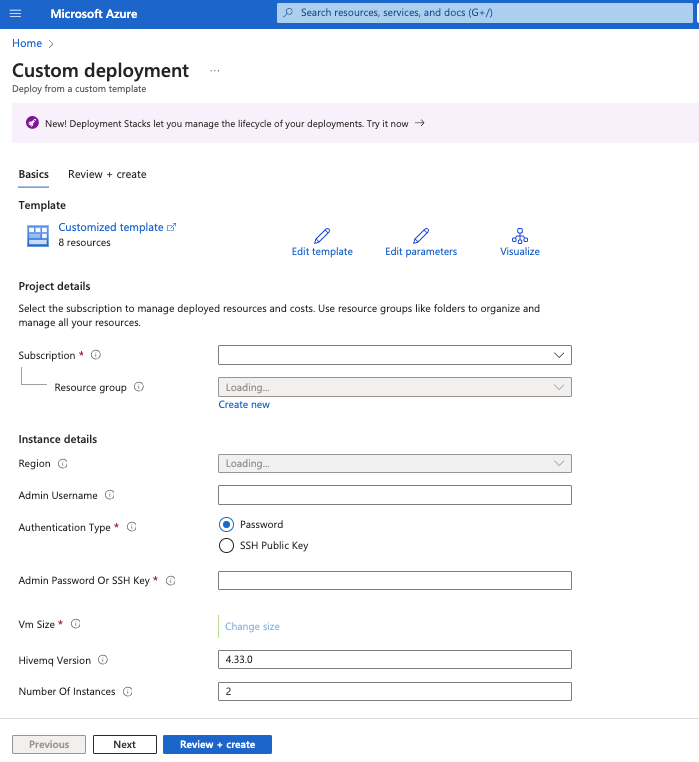
After you sign in to your Microsoft account, a page to edit the customized template you are about to deploy opens:
-
On the Custom deployment page, configure your Azure Resource Manager template to meet the needs of your individual use case. Required fields are marked with an asterisk (*):
| Project details | |
|---|---|
Subscription * |
Select the Microsoft Azure subscription in which the resource group is created. All resources in an Azure subscription are billed together. |
Resource group * |
Select the container Azure uses to hold the resources related to your HiveMQ ARM template. |
| Instance details | |
|---|---|
Region * |
Select the Azure region in which the virtual machine is deployed. |
Admin Username |
Define a name for the virtual machine. To complete the deployment, this name must be set. |
Authentication Type * |
Select the type of authentication the deployment requires. The following two options are possible:
|
Admin password or SSH Key |
Based on the authentication type you select, enter the password or SSH key of the virtual machine. For more information, see Create and use an SSH public-private key pair for Linux VMs in Azure. |
VM Size * |
Select the size of the virtual machine you want to deploy. The default VM size is Standard_F4s_v2. |
HiveMQ Version |
Enter the version of HiveMQ you want to deploy. The default version is 4.6.0. |
Number of Instances |
Enter the number of virtual machines you want to deploy in the cluster. The default value is 2. |
-
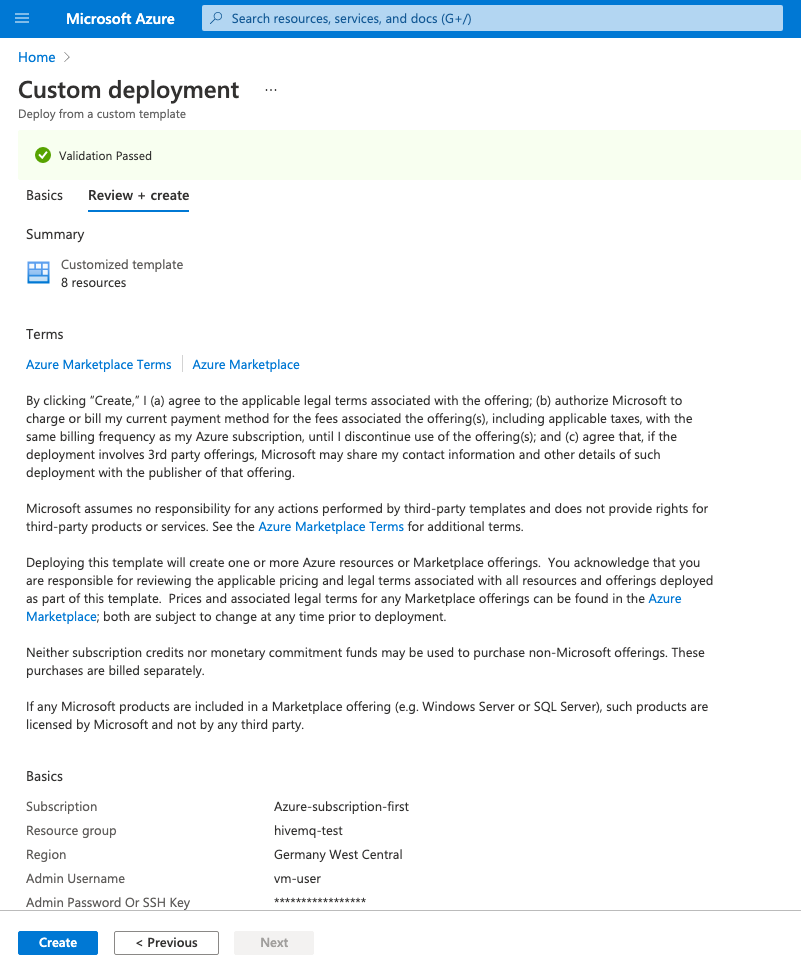
To save your changes and open a validation window, click Review + Create:
-
To confirm the template configuration and continue the deployment, review the Azure terms of service and click Create.
| Microsoft Azure bills you for all resources you create. When you delete a template deployment, the resources you created are not affected. To remove resources, you must delete the resource group. Deletion of a resource group permanently removes all resources in the resource group and cannot be undone. |
-
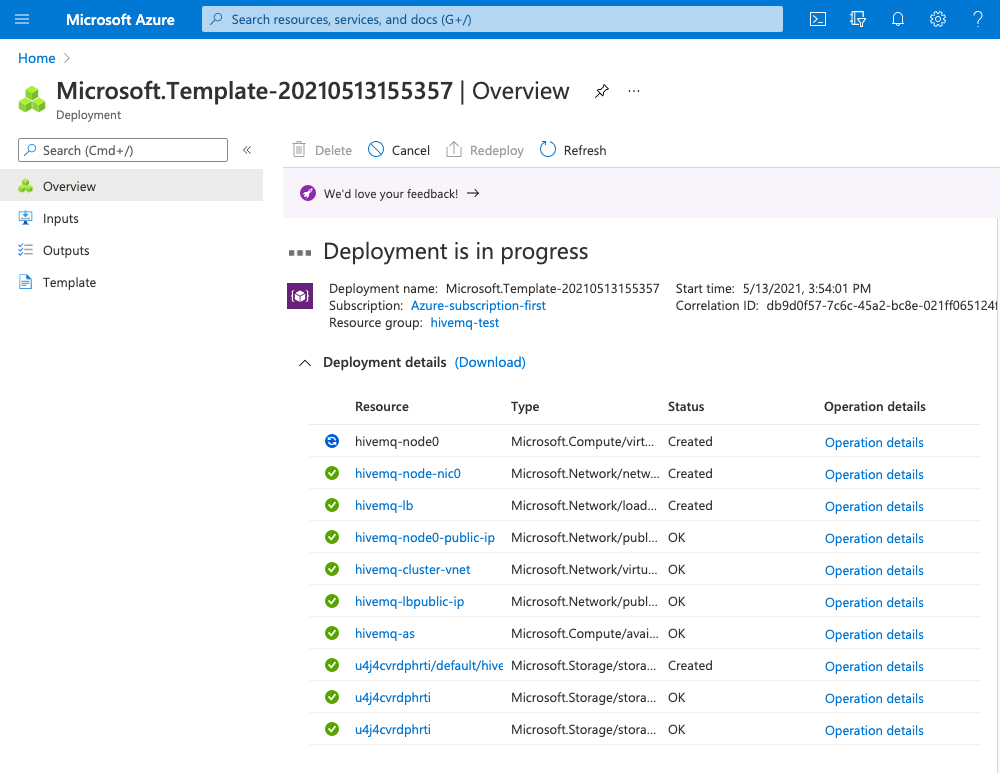
An overview window opens and shows the progress of your deployment:
-
To view progress information for each resource in the deployment as it is added, expand the Deployment details section.
The azuredeploy.json file of the hivemq-vm-cluster ARM template lists the parameter and variable configurations that the resource deploys.
|
-
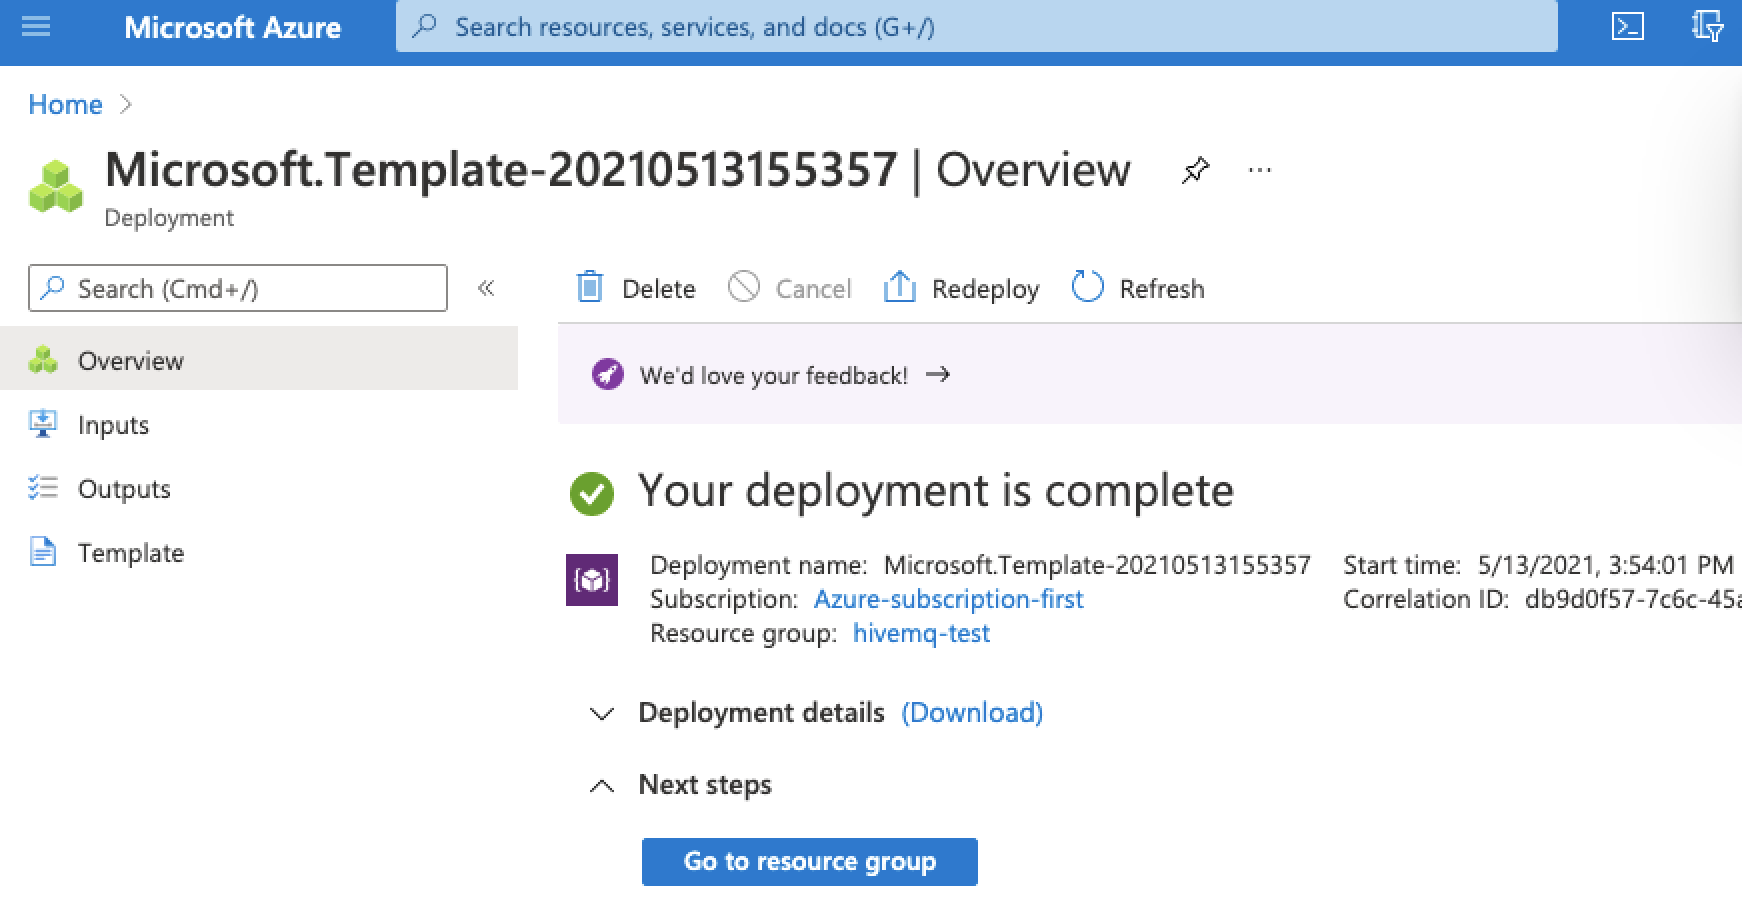
Once your deployment is complete, a deployment overview for your template opens:
Since version 4.3, HiveMQ only allows MQTT clients to connect if a security extension is present.
For testing purposes, HiveMQ includes a hivemq-allow-all-extension that authorizes all MQTT clients to connect to HiveMQ.
Before you use HiveMQ in production, you must add an appropriate security extension and remove the hivemq-allow-all-extension.
You can download security extensions from the HiveMQ Marketplace
or develop your own security extension.
|
-
If you have a valid HiveMQ license, install the license information on each HiveMQ node in your cluster.
For more information, see Install a HiveMQ License. Skip this step if you are running HiveMQ in evaluation mode. -
To verify that your HiveMQ cluster is running, check to see whether your HiveMQ Control Center is accessible:
-
If you use a load balancer, activate session persistence in your Azure load balancer configuration. Navigate with your browser to the public IP address of the load balancer:
http://<your-load-balancer-public-IP-address>:8080/v2. -
If you are not using a load balancer, navigate with your browser to the public IP address of one of the nodes in your HiveMQ cluster:
http://<your-cluster-node-public-IP-address>:8080/v2.
-
When you see the login dialog for the HiveMQ Control Center, you know that HiveMQ is up and running.
-
The HiveMQ Control Center is part of the standard HiveMQ distribution and is a web application that you can access from your browser for quick insights into your HiveMQ cluster.
| By default, the HiveMQ broker starts on the localhost IP address (127.0.0.1) and listens on port 1883. |
You do not need to install any additional software on your computer to use the control center. The default login credentials are: user: admin, password: hivemq. For more information, see HiveMQ Control Center.
| When you no longer need your HiveMQ cluster on Azure, delete the Azure resource group that you created. Deletion of an Azure resource group permanently removes the resource group and all associated resources. This action cannot be undone. Deletion of an Azure deployment does not affect the Azure resource group or the associated resources. |
Next Steps
To discuss your specific use case with one of our experts, contact us. We are happy to talk with you about setting up HiveMQ to meet your needs.