HiveMQ Control Center v2: Trace Recordings View
Your HiveMQ Enterprise MQTT broker can process millions of messages in a very short time. Without the right tools, understanding the behavior of a specific MQTT client or topic can be difficult. The Trace Recording feature allows you to log traffic for selected clients or topics to achieve the real-time visibility you need for efficient troubleshooting and analysis.
You can define filters using regular expressions to capture specific MQTT messages sent or received by the broker.
Each node in the cluster creates its own .trace file and stores it in the log/recordings directory.
When you download a trace recording from the HiveMQ Control Center, it bundles all node-specific .trace files into a compressed archive.
This unified format simplifies analysis and troubleshooting across the entire cluster.
Trace Recording States
Each trace recording can be in one of the following states:
| State | Description |
|---|---|
Scheduled |
Trace recordings can be scheduled to start at a future time. Until the start time arrives, the trace recording remains in a SCHEDULED state. The recording starts automatically at the configured time. |
Active |
A trace recording is in an ACTIVE state when the current time falls within the specified start and end time window. During the configured interval, the recording actively logs messages according to the applied filters. |
Completed |
A trace recording enters the COMPLETED state when the current time surpasses the end time or the recording is manually stopped before the scheduled end time. |
Cancelled |
If an error occurs during the trace recording process, the recording is CANCELLED and does not generate any log files. |
Create Trace Recording
To create a trace recording, select Create Recording and specify your settings in the Basics and Filters sections.
Basics Configuration
All fields in the Basics area are required.
| Field | Description |
|---|---|
Name |
Defines the filename of the |
Start |
Determines when the recording begins. By default, the recording starts immediately and lasts for one hour. If the start date is set to the current time or in the past, HiveMQ begins to record log messages as soon as the trace recording is successfully created. If the start date is set in the future, HiveMQ will schedule the trace recording to begin at the specified time. The default start time is the current time (now). |
End |
The end date specifies when HiveMQ stops the trace recording. The end date must be in the future and later than the start date. The default value is the current time plus one hour. |
Filter Configuration
In the Filters section, you define the criteria for the messages you want to record.
| Filter | Description |
|---|---|
Client ID |
Defines one or more client filters to capture messages related to specific topics. |
Topic Filters |
Defines one or more topic filters to capture messages related to specific topics.
You can combine as many Client ID and Topic filters as needed. |
MQTT Message Types |
Defines the types of MQTT messages to trace. |
Available MQTT Message Types
The following MQTT message types are available for your trace recording.
| At least one MQTT message type must be selected in the filters section. |
| Message Type | Description |
|---|---|
CONNECT |
The first message the client sends to the broker when the client establishes a connection to the broker. |
CONNACK |
The message the broker sends to the client to acknowledge the connection request of the client. |
SUBSCRIBE |
A message the client sends to the broker to subscribe to one or more topics. |
SUBACK |
The message the broker sends to the client to acknowledge the subscription request of the client. |
PUBLISH |
A message the client sends to the broker to publish data on a specific topic. |
PUBACK |
The message the broker sends to the client to acknowledge receipt and successful processing of a PUBLISH message with QoS 1. |
PUBREC |
The message the broker sends to the client to acknowledge receipt of a QoS 2 PUBLISH message. The PUBREC message is the first step in the QoS 2 publish/subscribe message flow. |
PUBREL |
The message that the client sends to the broker to acknowledge receipt of a PUBREC message. The PUBREL message is the second step in the QoS 2 publish/subscribe message flow. |
PUBCOMP |
The message the broker sends to the client to acknowledge receipt of the PUBREL message. The PUBCOMP message is the final step in the QoS 2 publish/subscribe message flow and confirms that the PUBLISH message with QoS 2 was processed successfully. |
UNSUBSCRIBE |
A message the client sends to the broker to remove a subscription to one or more topics. |
UNSUBACK |
The message the broker sends to the client to acknowledge the unsubscribe request of the client. |
PINGREQ |
A keep-alive message the client sends to the broker to indicate that the client is still connected and to prevent the broker from closing the connection due to inactivity. |
PINGRESP |
A keep-alive message that the broker must send to the client upon receipt of a PINGREQ message to confirm that the broker is still available and connected to the client. |
DISCONNECT |
The message a client sends to the broker to gracefully end an existing connection to the broker. |
| To learn more about MQTT and MQTT message types, we highly recommend our MQTT Essentials series. |
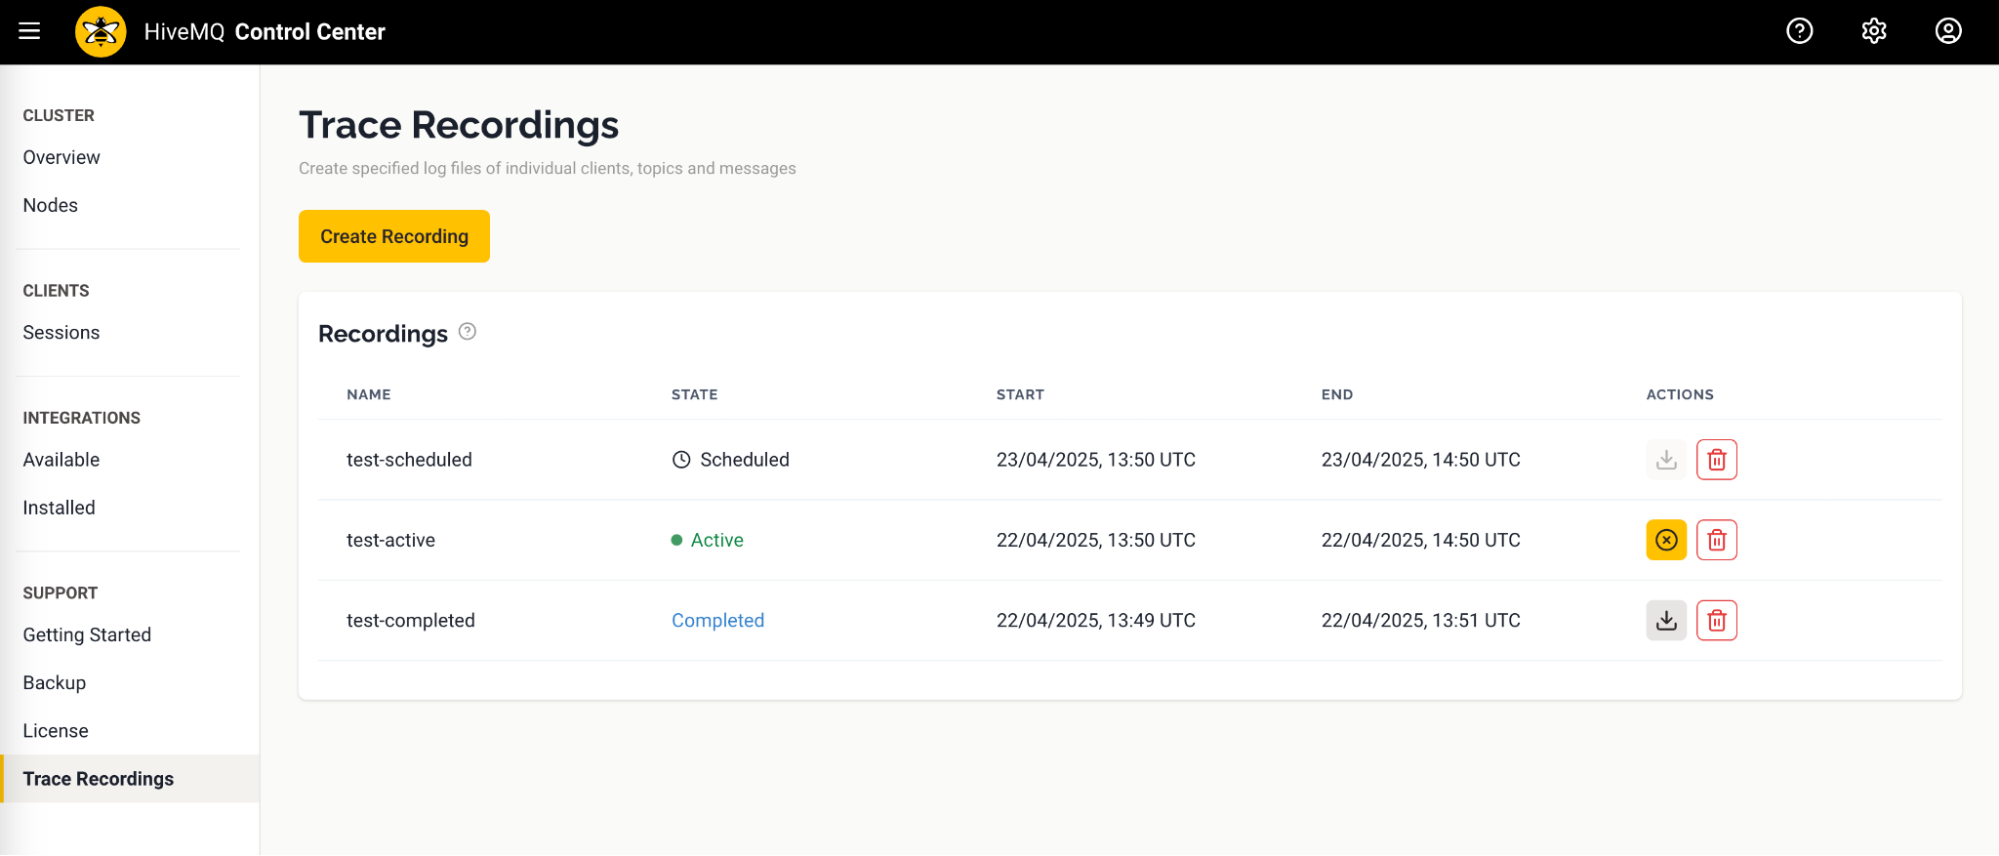
View and Manage Trace Recordings
After you create a trace recording, you are redirected to the Trace Recordings overview, where all your recordings are listed. From the overview, you can stop or delete a recording as needed.
To view details for a specific trace recording, select the recording on the Trace Recording overview.
If the recording is in a COMPLETED state, you also have the option to download the trace recording.