Development with the Maven Plugin
This chapter introduces the HiveMQ Maven plugin, which is a great help for any developer throughout the development lifecycle of a HiveMQ plugin.
Introduction
The plugin must be packaged as a JAR file (see Packaging and Deployment) and copied manually to the HiveMQ plugin folder (HIVEMQ_HOME/plugins) in order to initialize the plugin on HiveMQ startup. This process is very inconvenient and not suitable for a fast switching between developing and manual testing. Another set-back is that debugging can not be applied to a plugin in the way it would be possible with a normal Java application. The reason is that the plugin can not be debugged without a running HiveMQ instance. All these described scenarios are essential for an effective plugin development, and that’s why we created the HiveMQ Maven Plugin to solve these problems.
The Maven plugin helps developers to:
-
easily run their developed plugin on HiveMQ for testing purposes
-
successfully debug their plugin
Functionality
The Maven plugin automates the above stated steps, which are necessary to run a plugin on a real HiveMQ instance. Therefore you need to have a HiveMQ instance located on your development machine, which the plugin can use to deploy the plugin under development to. When the Maven plugin is invoked it will create an ad-hoc plugin directory in the maven build directory (this can also be customized, see the configuration options) and will move the plugin jar file to the newly created folder. If you want to test configuration files for your plugin, please put them in src/main/resources, because then they are copied to the ad-hoc plugins folder as well.
|
Plugin folder of HiveMQ, when working with the Maven Plugin
The plugin folder of the HiveMQ instance, used from the Maven Plugin, is not used.
Plugins or configuration files located there won’t be used when starting HiveMQ from within the Maven Plugin.
|
Afterwards the HiveMQ located in the specified directory (need to be declared using the configuration options) will be started with the ad-hoc plugin folder. The Maven plugin will then show the HiveMQ console output. This empowers plugin developers with an easy way for testing newly created plugins. Additionally it provides the capability to debug the plugin during runtime using the Java remote application debugging mechanism. Java Remote Debugging is a client/server concept, in which both parties, application (HiveMQ with plugin) and IDE, are able to be the server or the client. Each scenario brings other advantages and disadvantages:
-
HiveMQ with Plugin: Server; IDE: Client
-
Advantage
-
Easier handling, because HiveMQ can be started without IDE debugger being started first.
-
-
Disadvantage
-
If the code you want to debug is executed at startup, then you have to be quick in starting the IDE client debugger, otherwise the code you wish to debug is already been passed through.
-
-
-
HiveMQ with Plugin: Client; IDE: Server
-
Advantage
-
It is possible to debug code at startup
-
-
Disadvantage
-
Before the HiveMQ can be started, your IDEs debugging process need to be up and running.
-
-
Both of these scenarios have a right to exist and can be switch through the configuration options of the Maven plugin. It is also possible to specify the port on which they connect and the host name of the server, if HiveMQ is running in client mode.
|
Best Practice
Use CLIENT mode, when you want to debug code in your callback and only use the SERVER mode,
when debugging the Plugin Module or Plugin Entry Point is necessary.
|
Usage
As an effective way to use the plugin, an own Maven profile attached to the Maven package goal has been proven to be a great workflow. This triggers the plugin to be ran on HiveMQ every time the Maven package goal is executed and the profile RunWithHiveMQ is active. In order to make it work as described the following snippet has to be added to the pom.xml in the root folder of the plugin project. This is already part of the project if the provided Maven Archetype was used. The only change which needs to be made is to provide the correct HiveMQ home folder.
|
IDE Support
For more information on how to do this with your favorite IDE look here.
|
<project....>
...

    <profiles>
        <profile>
            <id>RunWithHiveMQ</id>
            <build>
                <plugins>
                    <plugin>
                        <groupId>com.hivemq</groupId>
                        <artifactId>hivemq-maven-plugin</artifactId>
                        <version>3.0.0</version>
                        <executions>
                            <execution>
                                <id>hivemq</id>
                                <phase>package</phase> (3)
                                <goals>
                                    <goal>hivemq</goal>
                                </goals>

                                <configuration>(1)
                                    <hiveMQDir>
                                        /Applications/hivemq (2)
                                    </hiveMQDir>
                                </configuration>

                            </execution>
                        </executions>
                    </plugin>
                </plugins>
            </build>
        </profile>
    </profiles>
...
</project>| 1 | All configuration properties for the Maven plugin have to be placed in here. |
| 2 | Please specify the HiveMQ home directory. If you have not downloaded HiveMQ yet, please download the latest HiveMQ. |
| 3 | Here you can change the Maven phase during which the plugin is executed, it only makes sense to do this in package or later phases, because during package the plugin jar file is generated. |
Configuration Options
In general, the Maven plugin has reasonable defaults, but sometimes it is necessary to adjust some settings or just to get an overview of the default settings.
| The HiveMQ directory configuration property is the only mandatory one. |
| Name | Default | Required | Description |
|---|---|---|---|
|
true |
This need to be set to your local HiveMQ directory. If you have not downloaded HiveMQ yet, please download the latest HiveMQ. |
|
|
{artifactId}-{version}.jar |
false |
The name of the plugin jar file. |
|
${project.build.directory} |
false |
The directory in which your plugin jar file is located. |
|
hivemq.jar |
false |
The name of the HiveMQ jar file in the bin directory. |
|
true |
false |
This property specifies, whether the messages logged from HiveMQ to the console should be shown or not. |
|
false |
false |
When this is set to true, HiveMQ will start without using the plugin, which is currently under development. A possible use case would be to compare the behaviour of HiveMQ with and without the plugin. |
|
SERVER |
false |
Specifies the debug mode of the plugin. Valid values are NONE, SERVER and CLIENT. Use NONE for starting HiveMQ + plugin without debugging. When you want to debug the bootstrapping part of your plugin use CLIENT, otherwise user SERVER. For more insights about debug modes see the functionality section. And make sure to configure your IDE corresponding to your debug mode. |
|
5005 |
false |
The debug port on which the debug server starts when in SERVER mode or the client connects to when in CLIENT mode. |
|
localhost |
false |
If the debugMode is CLIENT, through this property it is possible to specify the host name of the debug server (for example the machine your IDE is running on). This is only needed if you want to remotely debug your plugin on another machine, see also the functionality section. |
Workflow with common IDEs
|
Prerequisites
You can use any plugin, where the HiveMQ Maven plugin is configured, which means that the pom.xml should contain
the snippet shown here. The simplest method is to create your own plugin HelloWorld project with the provided
Maven Archetype. Be advised to change the HiveMQ home directory!
|
IntelliJ IDEA
Run HiveMQ with Plugin
-
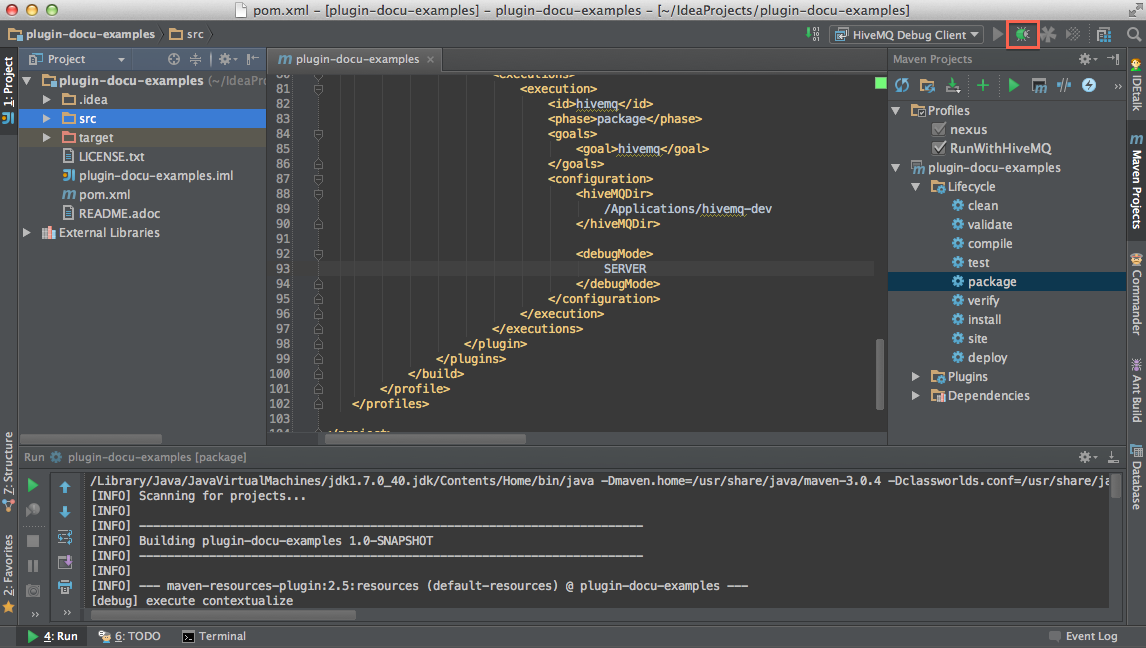
Open the pom.xml and create a new configuration element debugMode in the Maven Plugin and set value to NONE
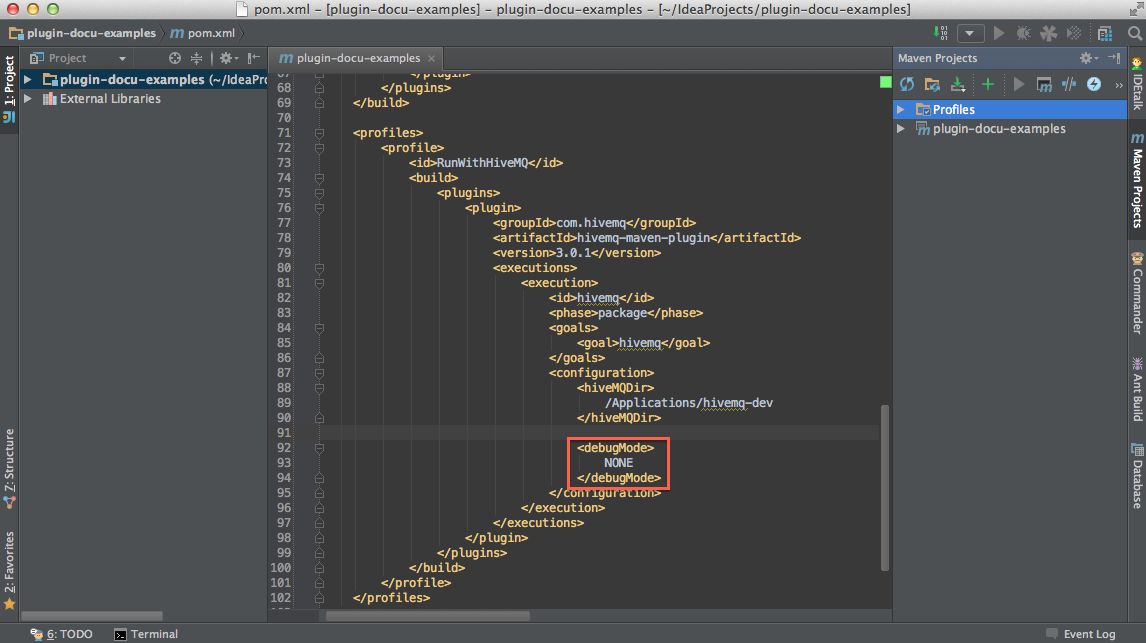
-
Run Maven Goal package and make sure Profile RunWithHiveMQ is selected

==== Debug Plugin in Server Mode
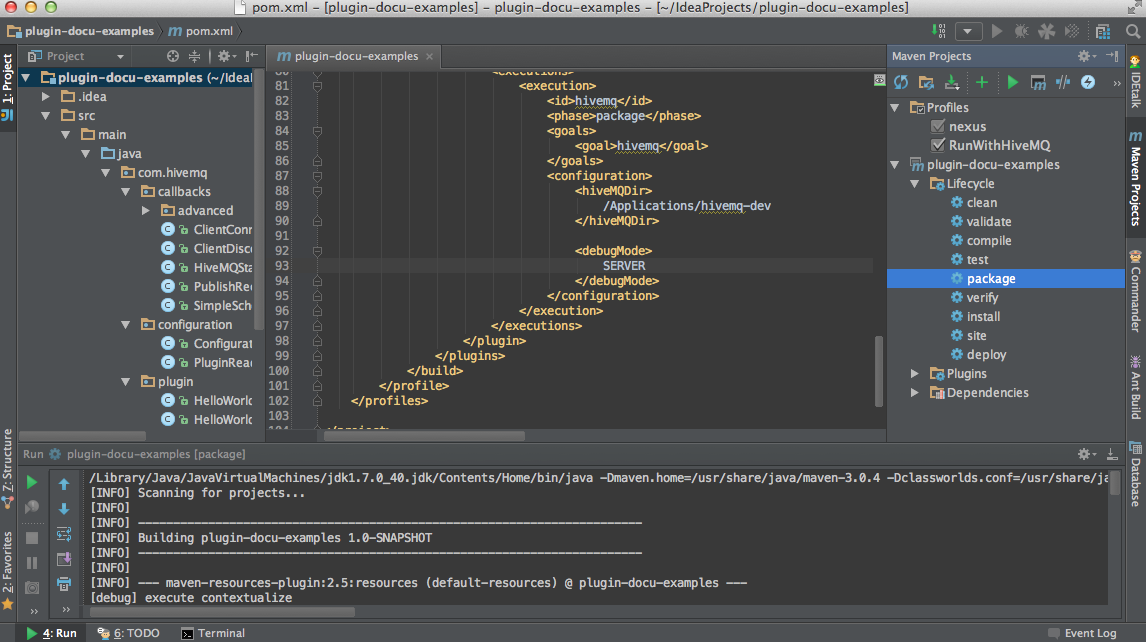
-
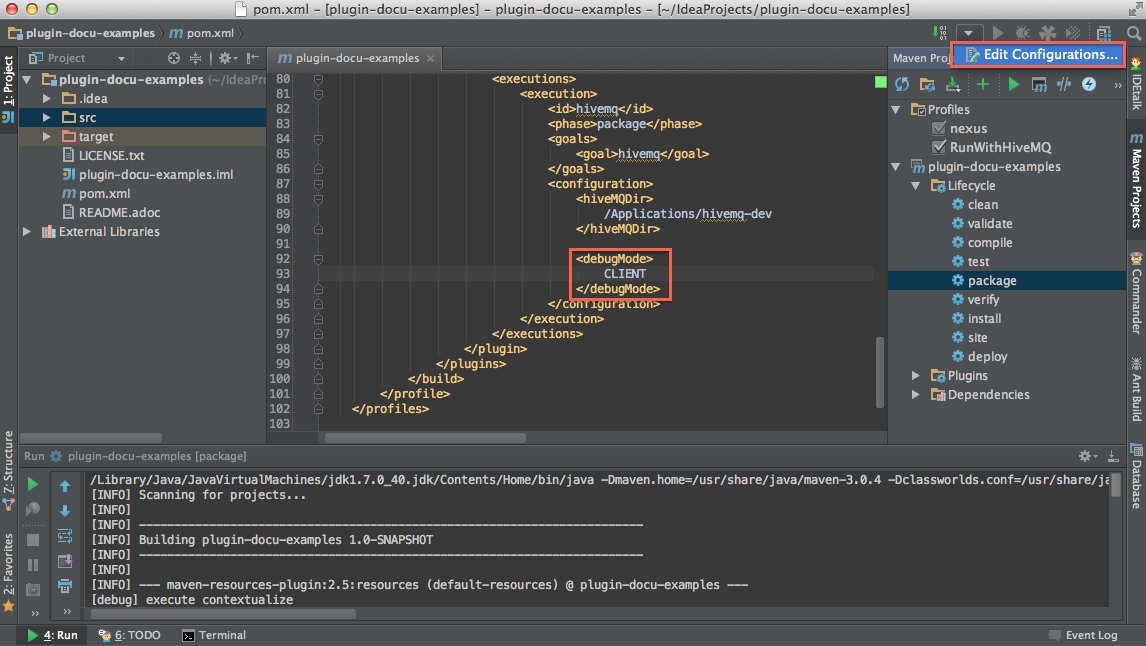
Create new configuration element debugMode and set value to SERVER, Run Maven Goal package and make sure Profile RunWithHiveMQ is selected
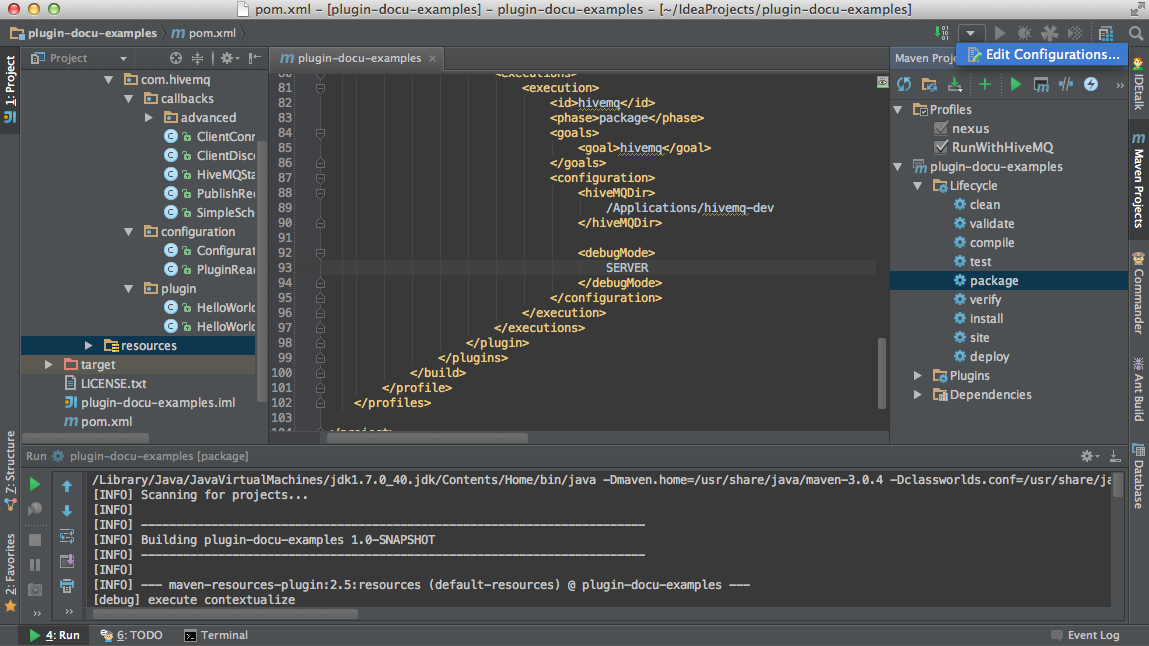
-
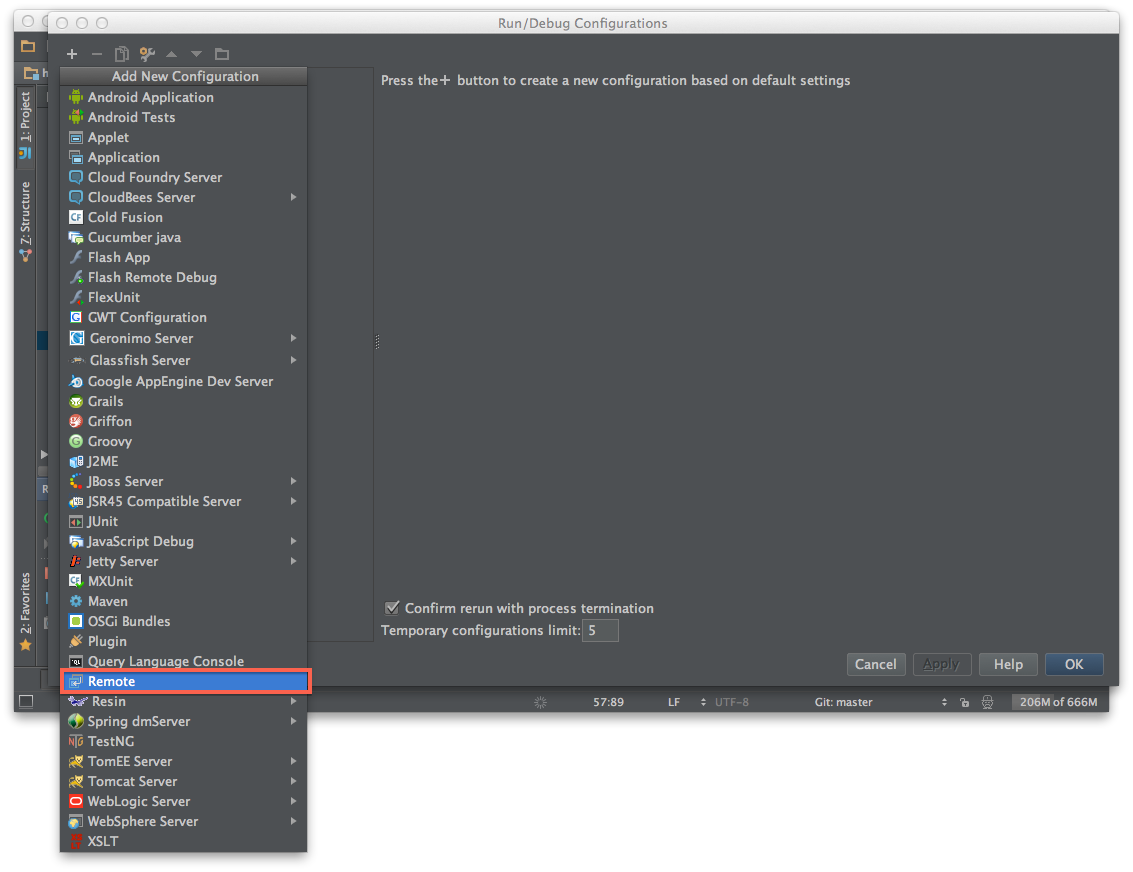
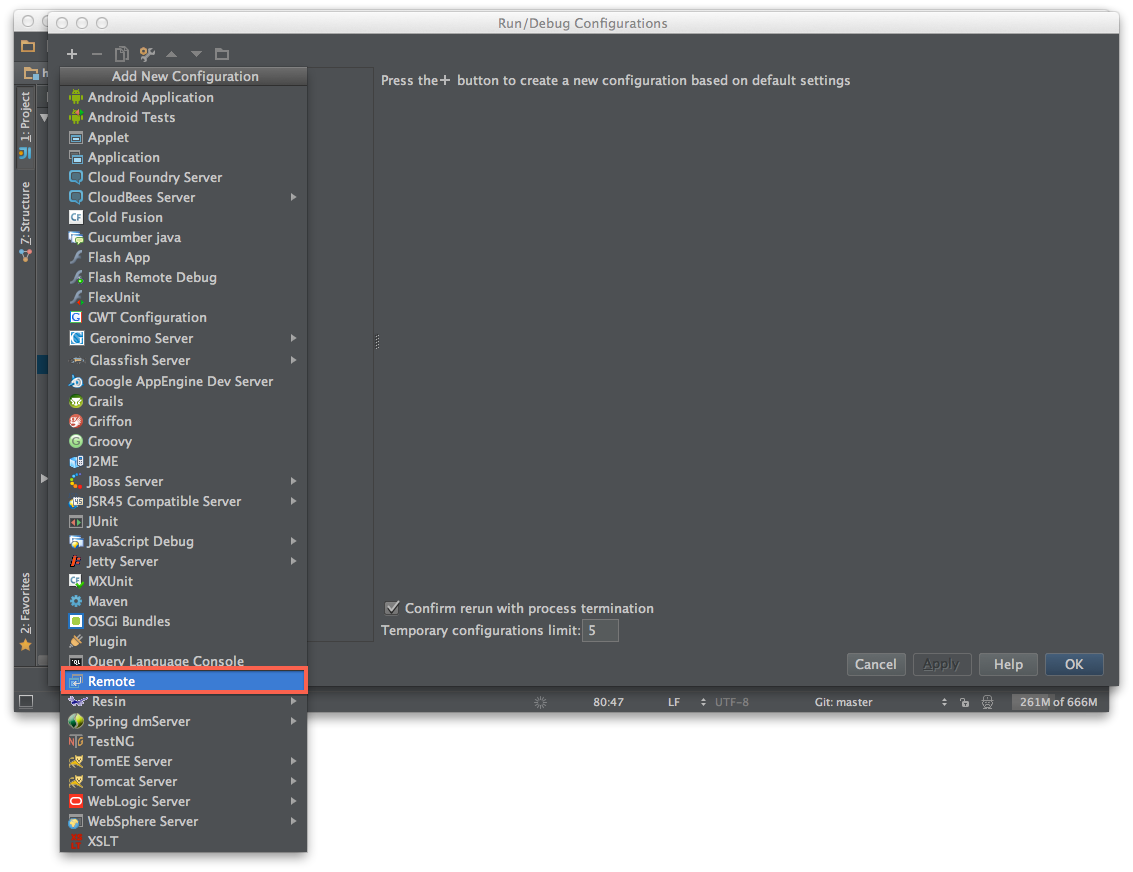
Create a new Run Configuration
-
Select Remote Configuration
-
Make sure the Transport is set to Socket, Mode is set to Attach and the port is 5005.
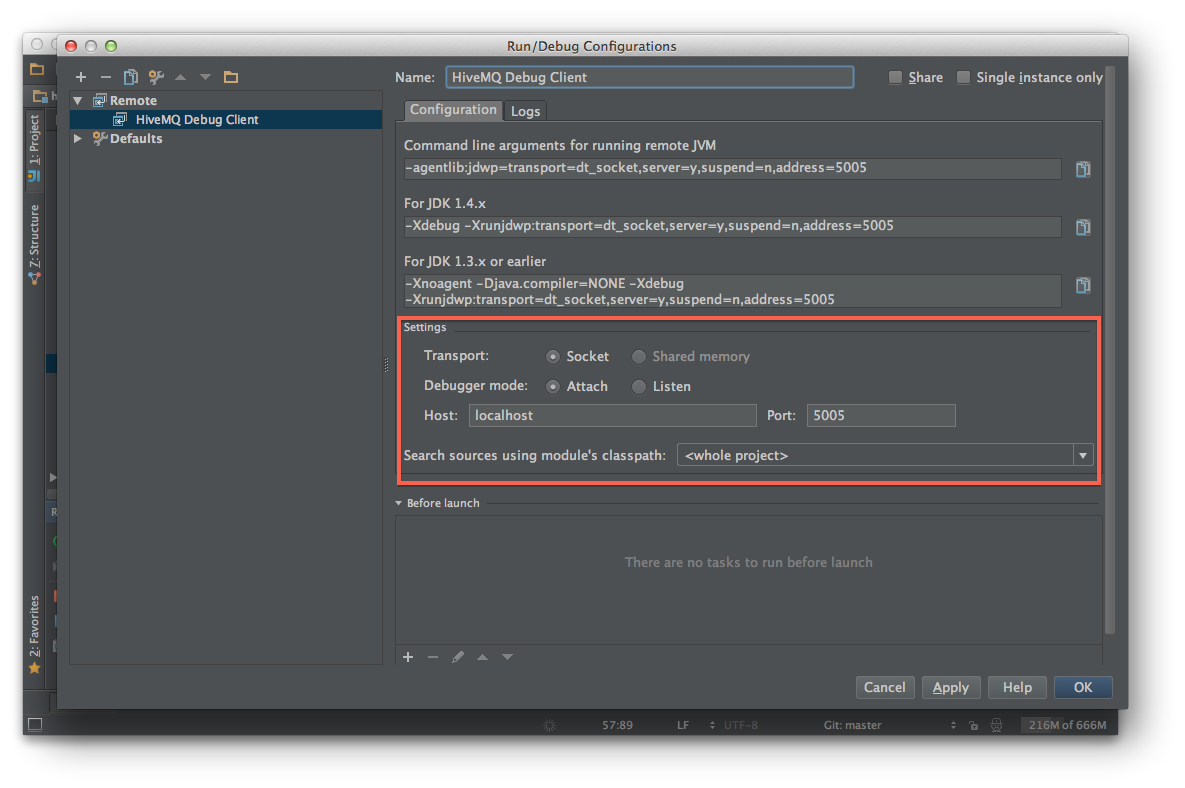
-
Run the newly created Configuration
-
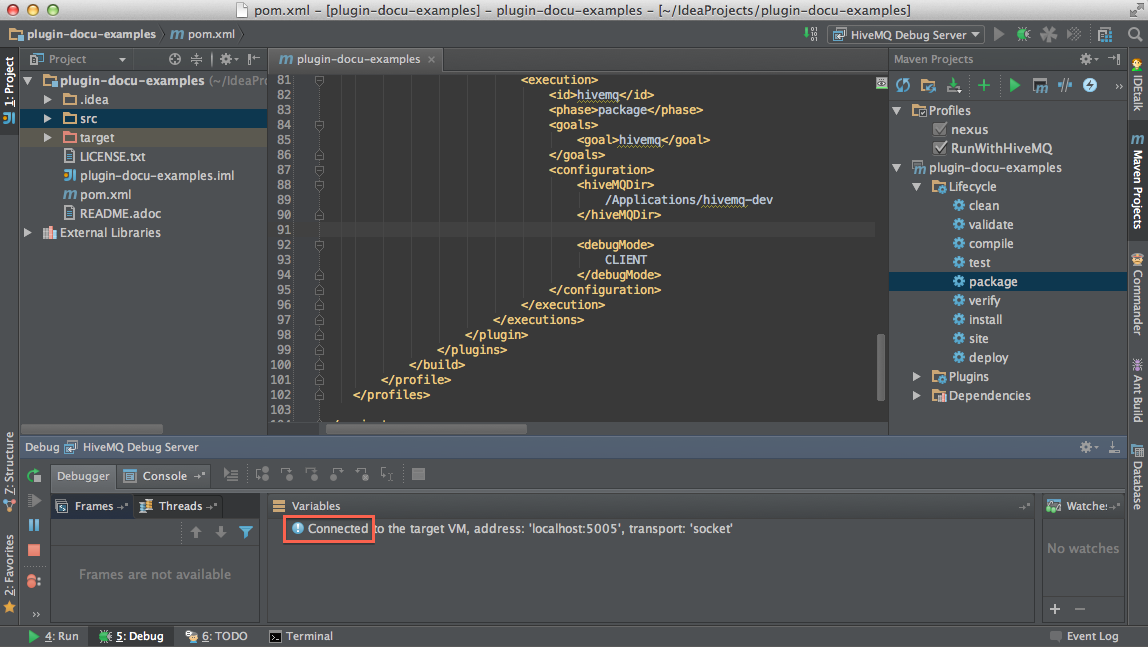
Wait until the Debugger Console opens and shows Connected

==== Debug Plugin in Client Mode
-
Create new configuration element debugMode and set value to CLIENT and create a new Run Configuration
-
Select Remote Configuration
-
Make sure the Transport is set to Socket, Mode is set to Listen and the port is 5005.
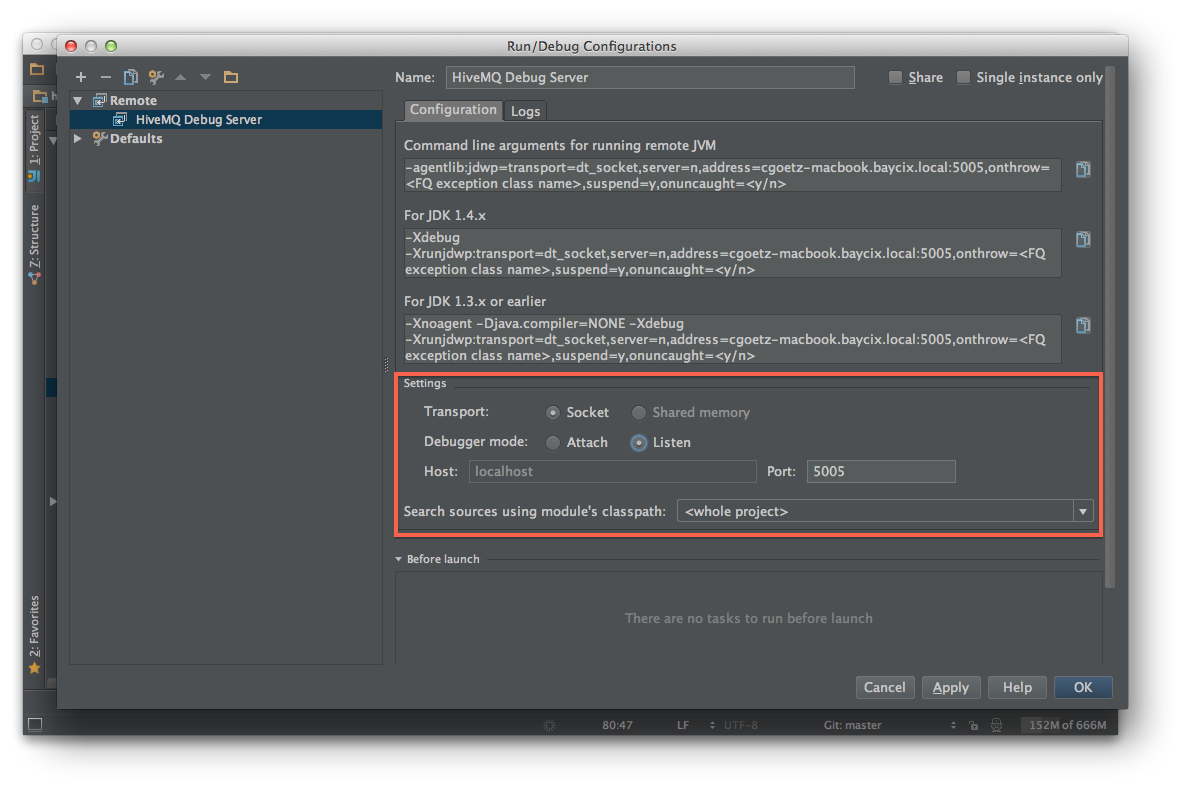
-
Run the newly created Configuration
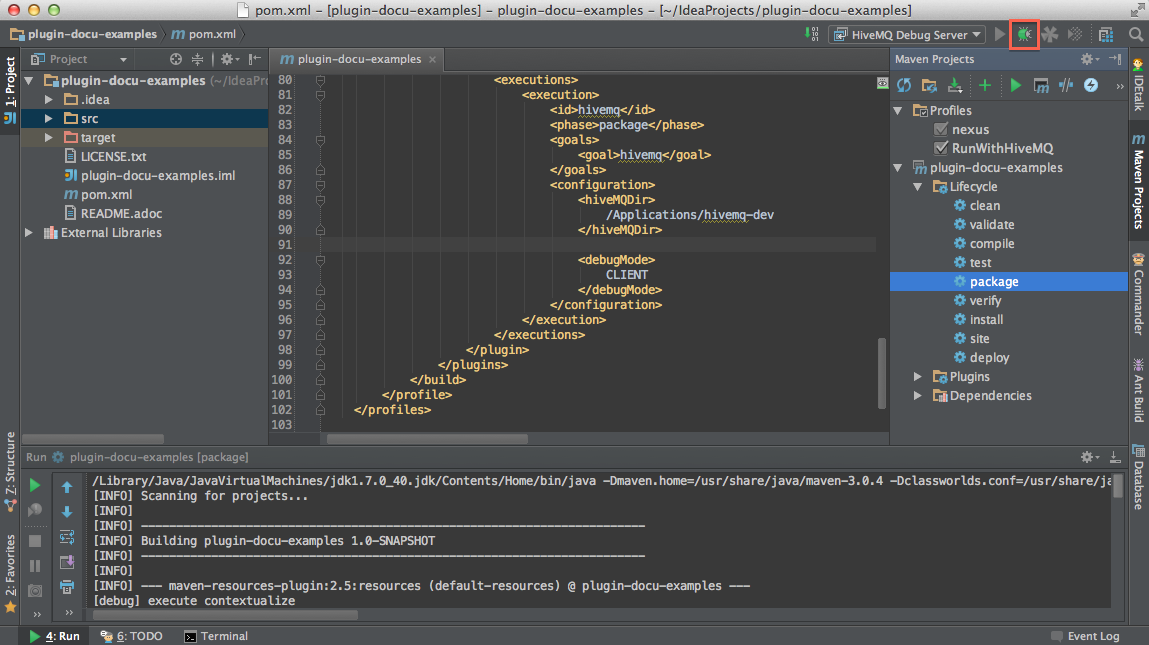
-
Wait until the Debugger Console opens and shows Connected, then run Maven package
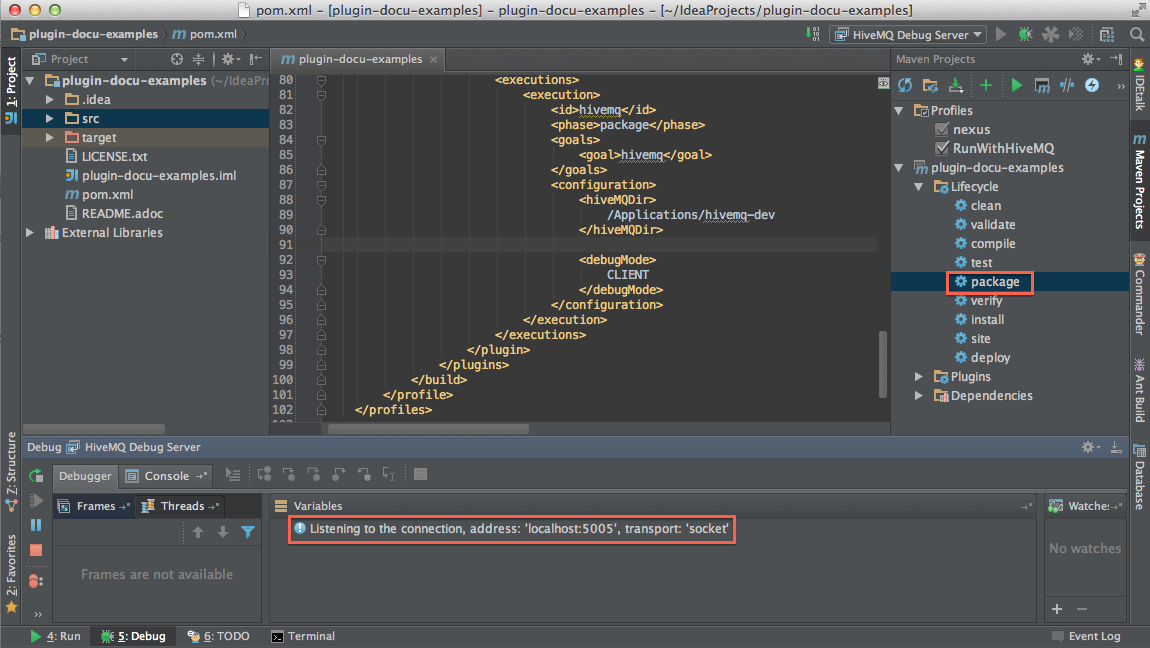
-
Wait until HiveMQ is started
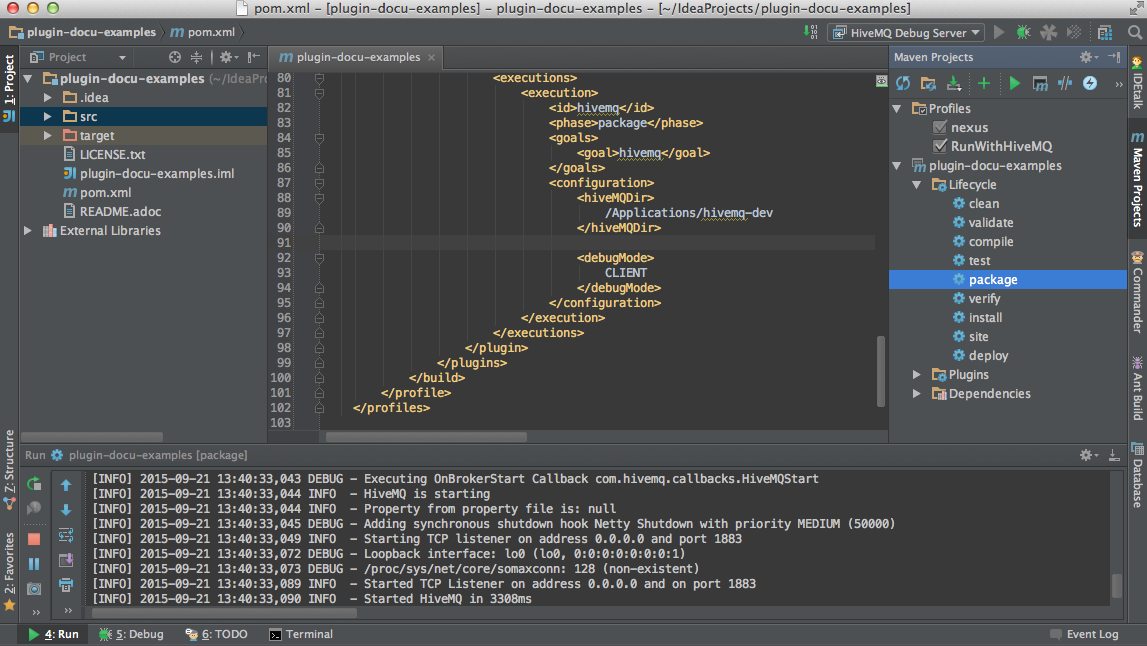
-
Switch to the Debug window and check if it shows Connected
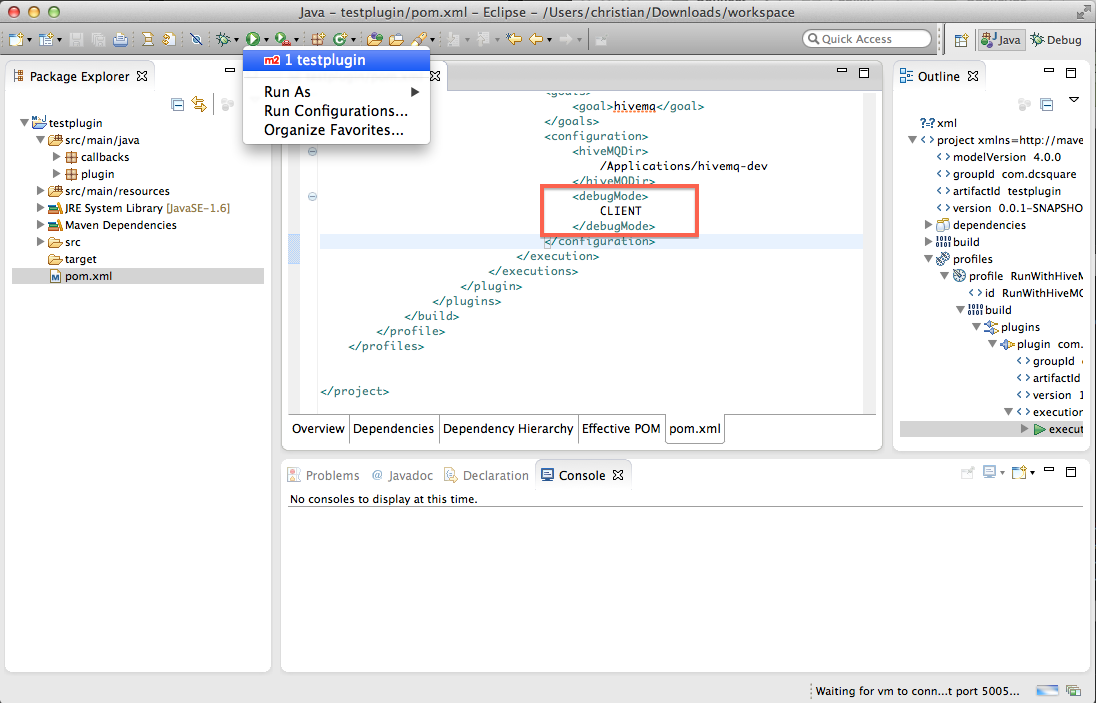
Eclipse
Maven Goal Package
-
Create new Run Configuration for Maven Goal

-
Insert Maven Goal package und Profile RunWithHiveMQ
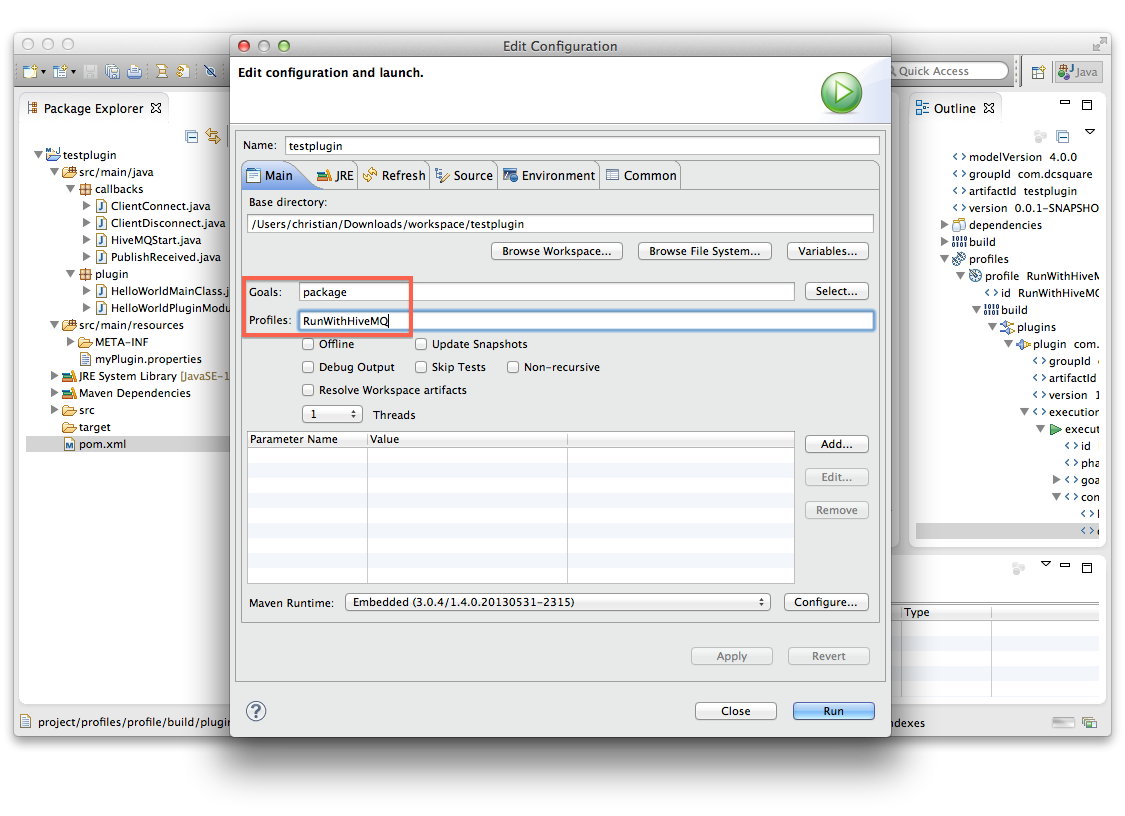
-
Click apply and you are done!
Run HiveMQ with Plugin
-
Open the pom.xml and create a new configuration element debugMode in the Maven Plugin and set value to NONE
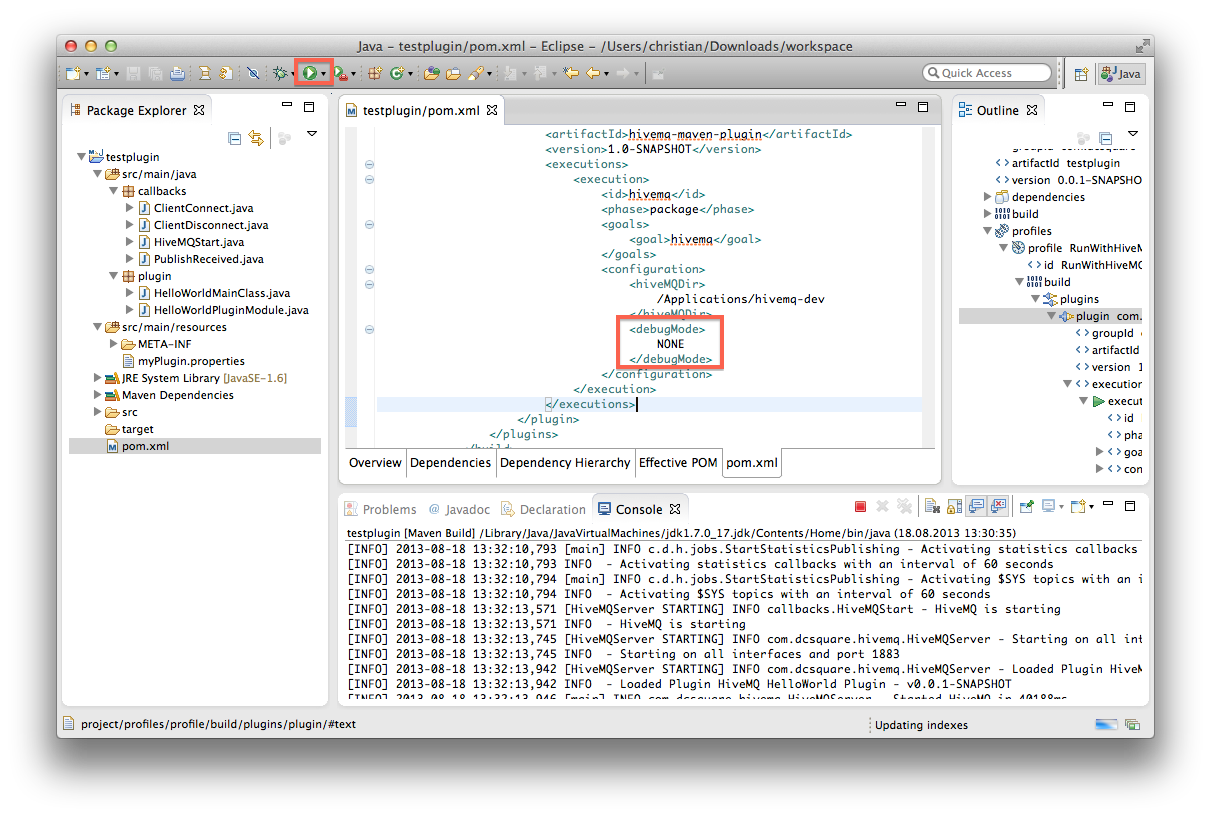
-
Click on the Run icon to run the above created Run Configuration.
-
Done! HiveMQ is starting in the Maven console.
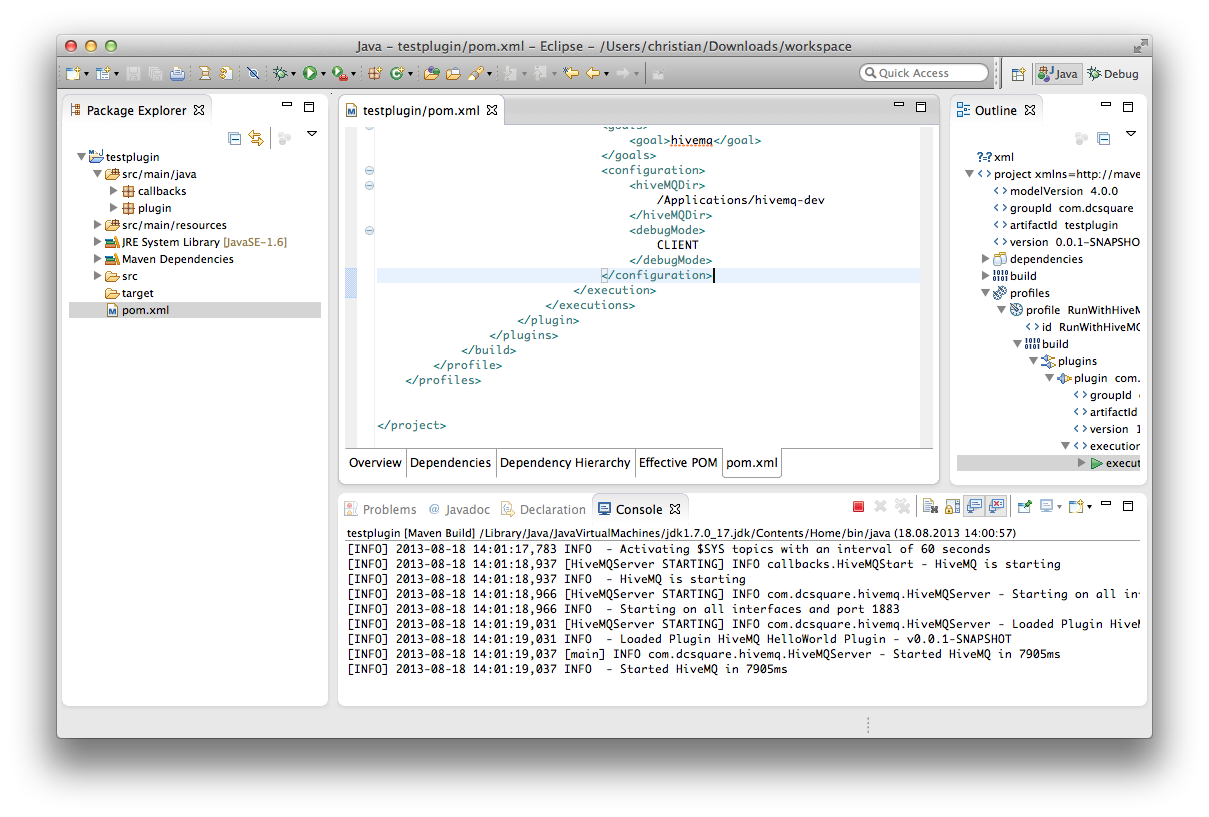
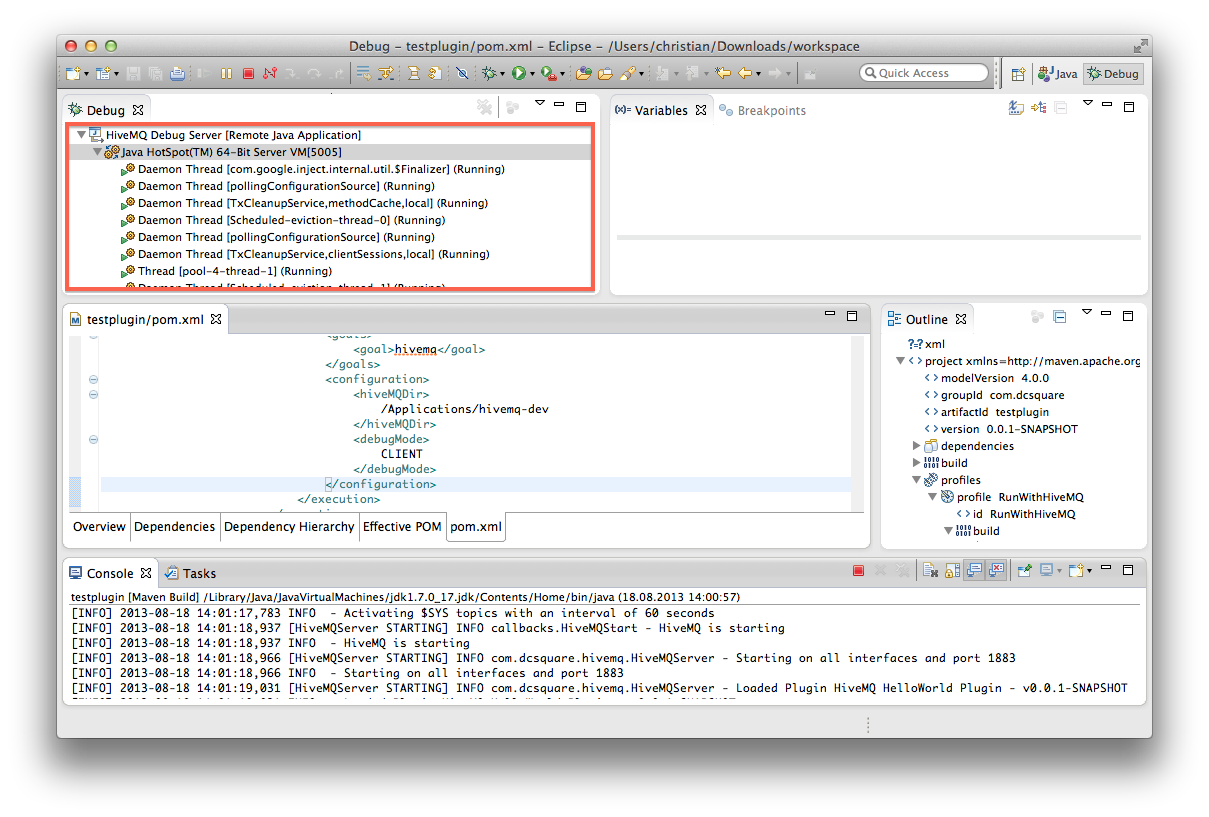
Debug Plugin in Server Mode
-
Create new configuration element debugMode and set value to SERVER; Run Maven Goal package
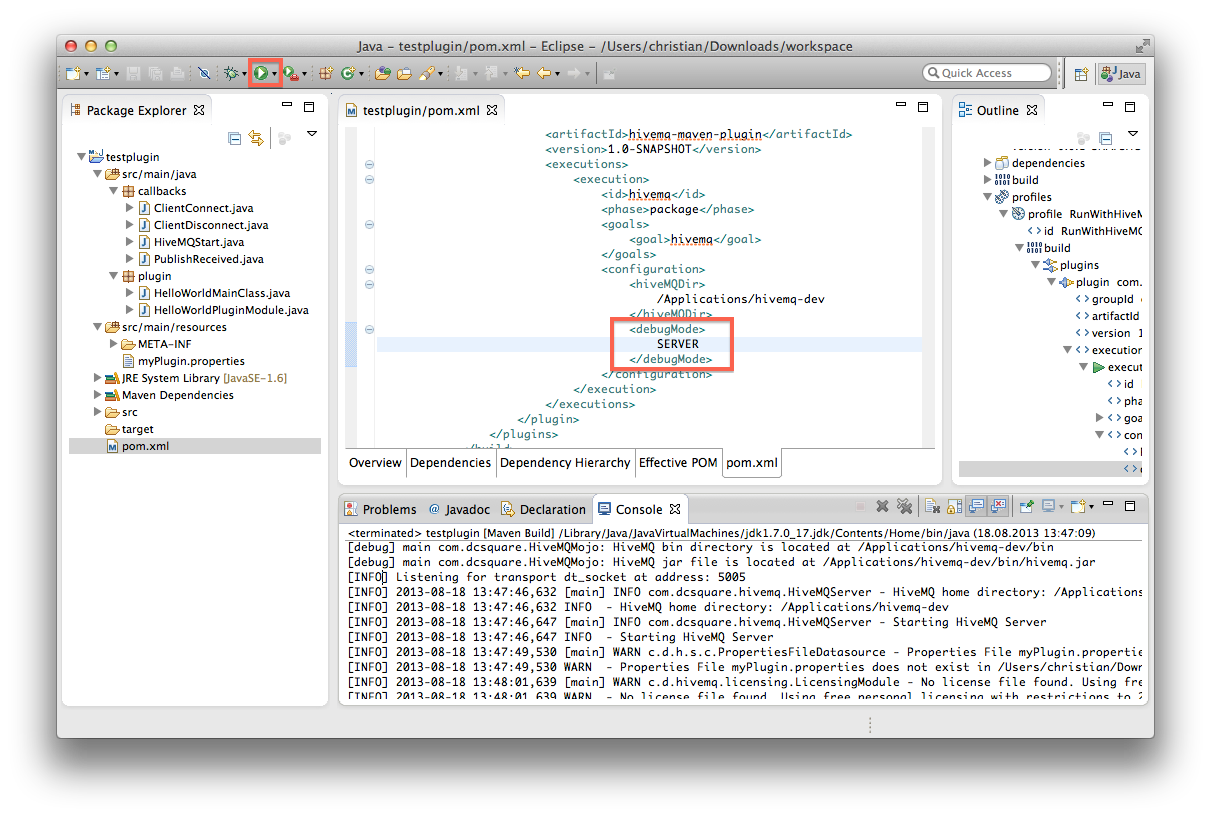
-
Create a new Debug Configuration: Remote Java Application

-
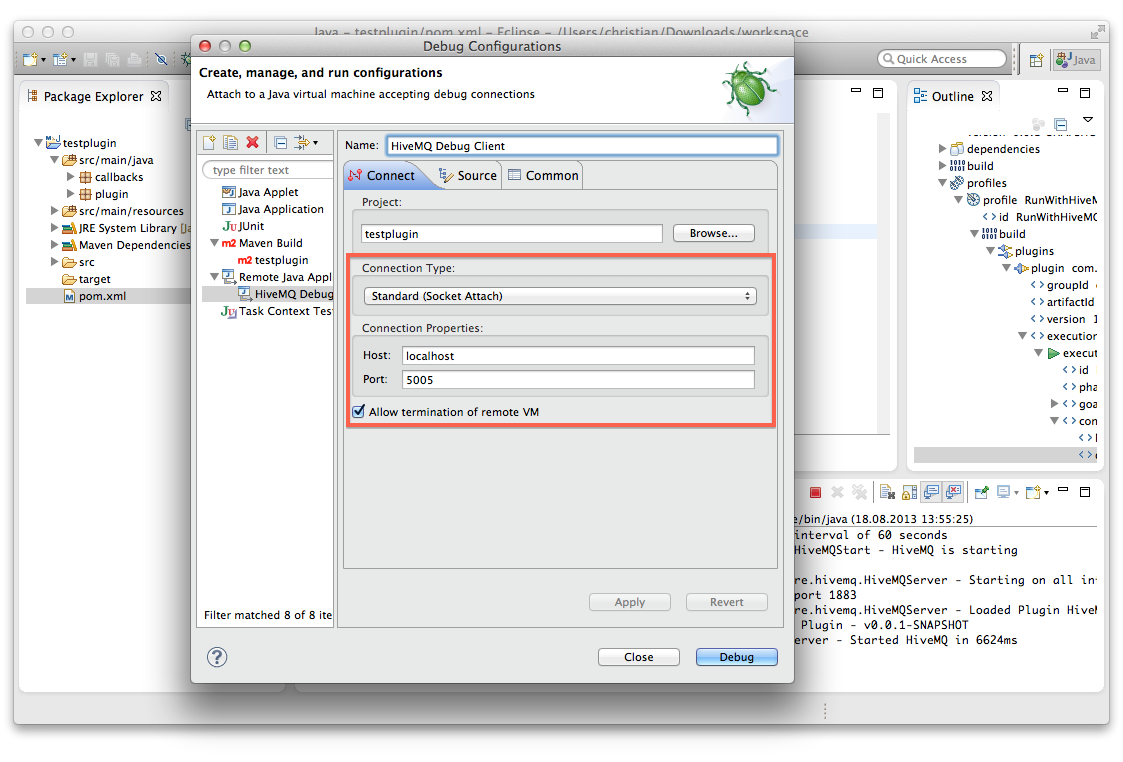
Make sure Connection Type is Socket Attach, the host is localhost, the port is 5005 and then click Debug
-
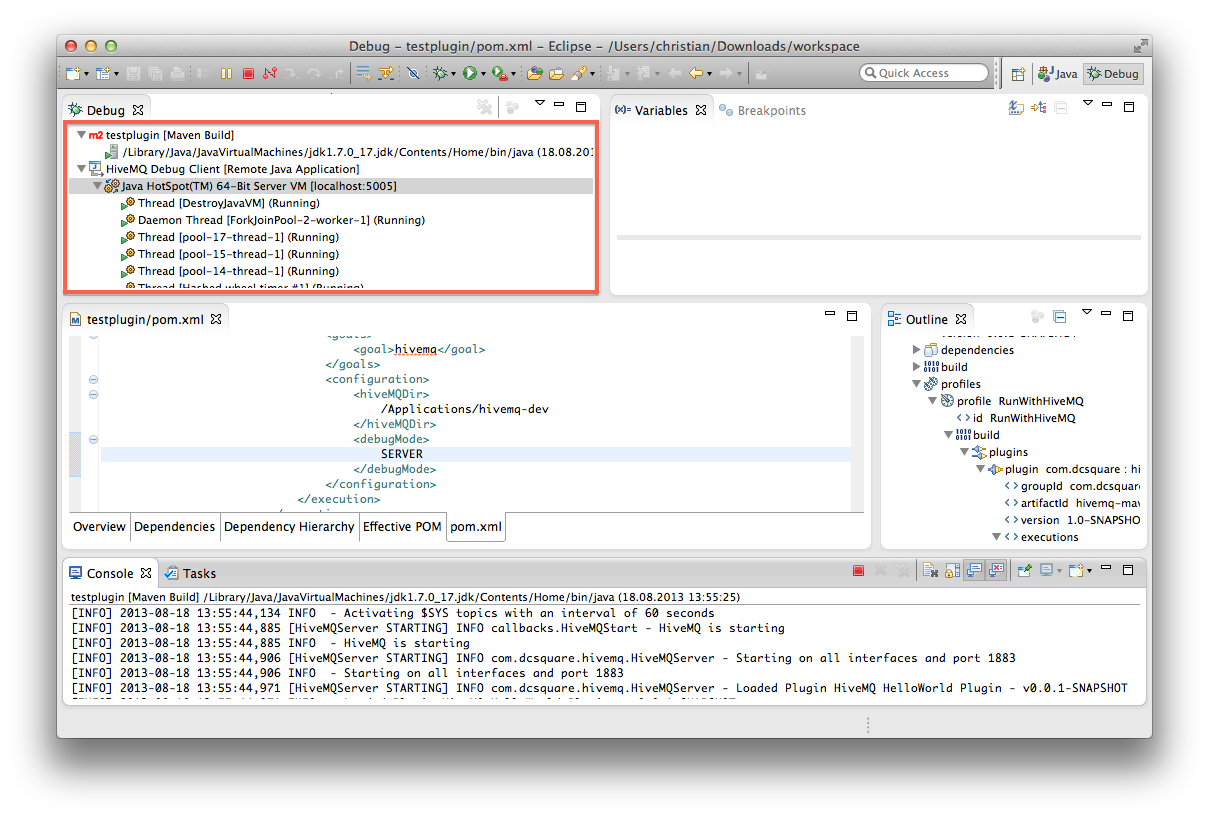
Change to the Debug Perspective and check if the debugger is running
Debug Plugin in Client Mode
-
Create a new Debug Configuration: Remote Java Application
-
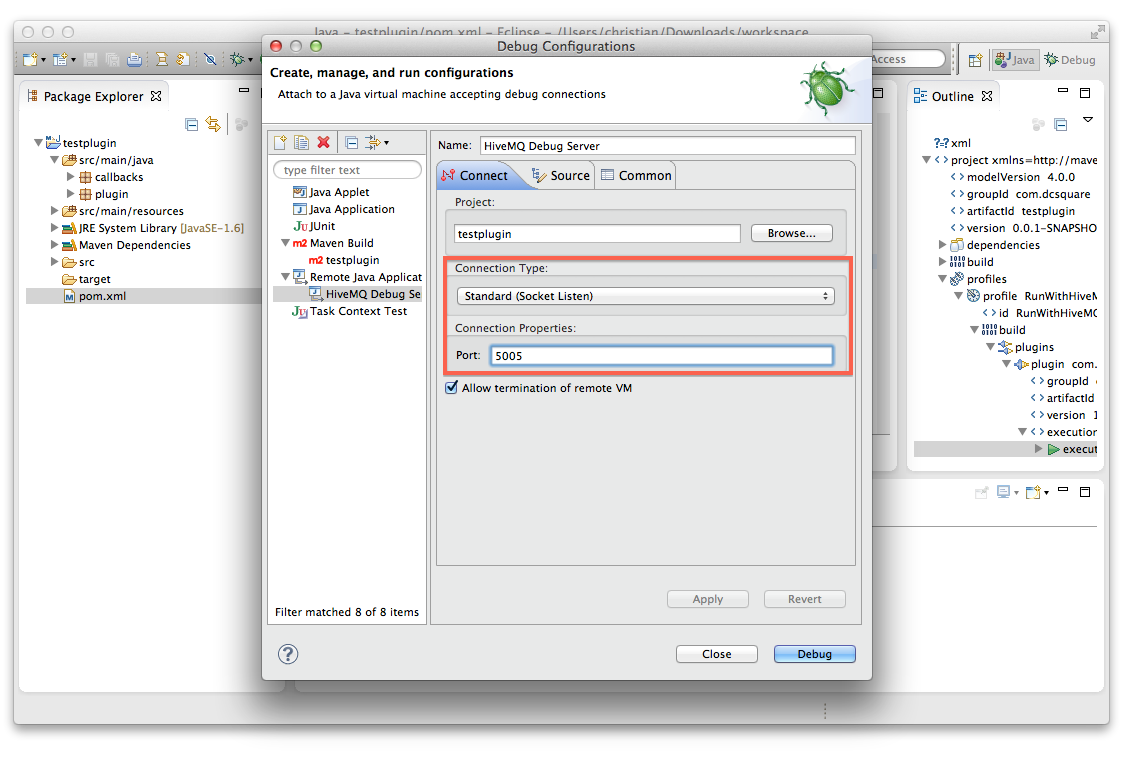
Make sure Connection Type is Socket Listen, the port is 5005 and then click Debug
-
Change to the Debug Perspective and check if the debugger is listening
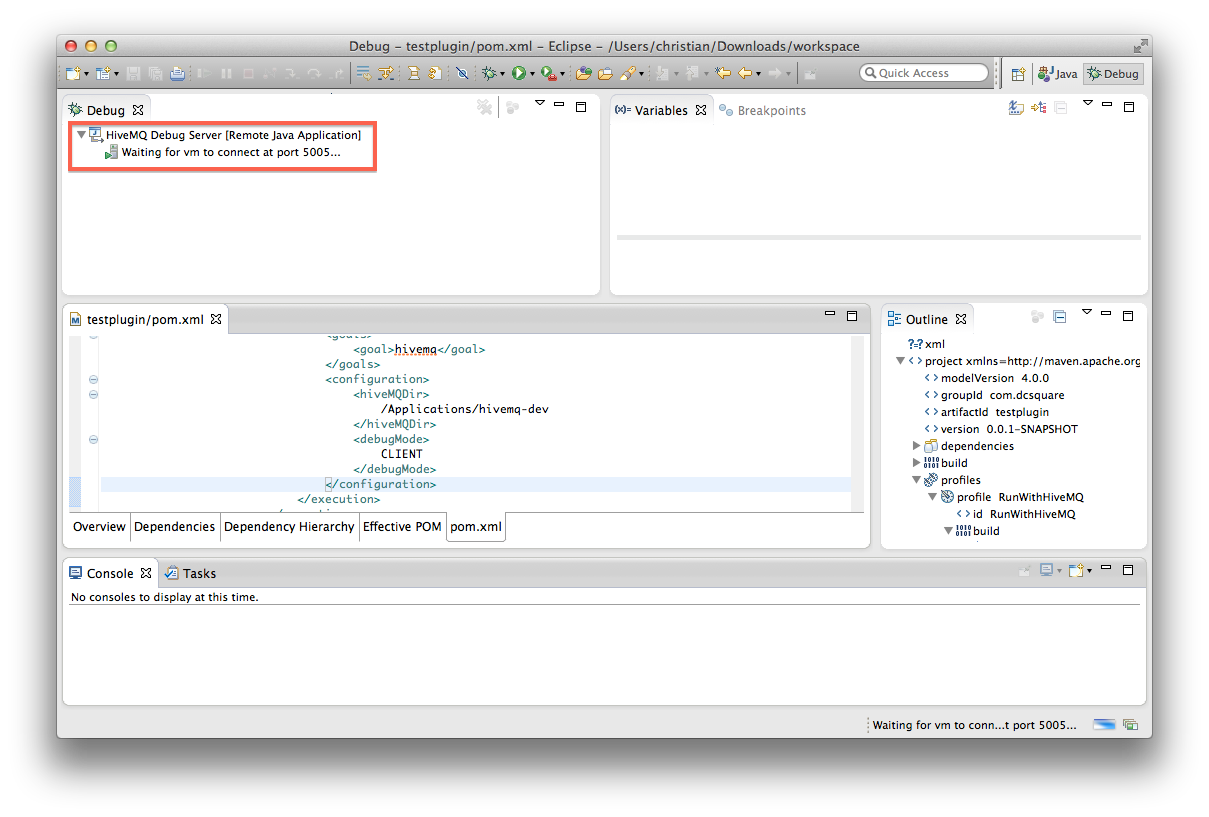
-
Create new configuration element debugMode and set value to CLIENT; Run the Maven Goal package
-
Wait until HiveMQ is started
-
Change to the Debug Perspective and check if the debugger is connected
Packaging and Deployment
If you want to package the plugin and deploy it to your production environment, just follow these steps:
-
Execute the Maven goal package without the RunWithHiveMQ Profile (see Maven Plugin usage)
-
Find the jar file following this naming conversion <artifactId>-<version>.jar in your project build folder, usually target
-
Copy the jar file and all configuration files (if needed) to the HiveMQ plugin folder (HIVEMQ_HOME/plugins) in you production environment
-
Start HiveMQ … Done!